
Gyms, Zoos, and Museums: Your documentation should be in-game
This is a talk I gave at a few conferences in 2025, including Godotfest. Below the video is a written version of the talk.
This is a gym
A gym
This is a zoo
A Zoo from Counter-Strike: Global Offensive, for level de_nuke, which Valve released.
This is a museum
Museum, by Epic, for their Cloth system in Unreal
And you can even automate their creation.
A menu showing an option with ‘Generate Asset Zoo’, from AssetPlacer for Godot, made by Cookie Badger.
Hi, I am Robin-Yann Storm, and this is Gyms, Zoos, and Museums: Your documentation should be in-game.
First, who is Robin-Yann Storm? Who am I?
I have over 15 years of game development experience.
I was a Tool Designer at Io-Interactive, working on the Glacier editor, used to build the Hitman games.
I was a Tool Designer at Guerrilla Games, working on the Decima editor and engine, used to build the Horizon games.
I was a Tool Designer at Apple, in California, working on Reality Composer & Reality Converter
I was also a Tool Designer on the recently released Hytale
I am a co-inventor on 5 patents, which you can google if you’d like
And nowadays I am a Freelance Product & UX Designer, working as a consultant.
(Note: I really dislike having to put my experience at the start, but I have noticed over the years that to most folks it gives credibility to the arguments that follow, even though I feel the arguments and examples should speak for themselves.)
Why do videogames need in-game documentation?
It is because at any company, there are games of telephone, and information gets lost. For example, let’s say you are wondering “How far can a player jump?”. Maybe you are making a level, and need to know the right distance for the geometry so a player can make the jump.
You hear that Alex knows, but Alex says that Sam knows.
Sam says it’s on confluence.
So you look there, but turns out it’s on Slack.
But the Slack channel for that is locked, so you have to ask for an invite.
So you find someone to invite you, and you get invited.
And then finally, you found it! You found the document that says how far a player can jump.
That’s a game of telephone. You are moving from thing, to person, to person, to thing, and it takes a while to get your questions answered. Which creates so much room for error! This happens for many questions. Such as:
“How far can a player jump?” because I have to make sure the geometry in the level aligns.
“How low can a player crouch?” because otherwise the player may get spotted by guards
“What is that animation called?” because someone says the animation cannot be found and they are trying to schedule it to be rebuilt.
“What is the name of that NPC?” because its name has already changed 3 times during development, due to story revisions, so what is it called now?
These are all normal questions to ask. Because everything changes all the time. Some call that chaos. Or a ‘fast paced environment’. Or ‘Agile’. But however you feel about it, change is a natural part of iteration. And games have constant iteration. That is a good thing! But, constantly having to update documentation is tough.
Back in the day I used to be taught a big GDD, a Game Design Document, was the thing to make, and to then always keep it up to date with any changes. Those days have passed. This is not what you should be doing anymore nowadays. You can check this yourself by asking a simple question:
Are you shipping your documentation, or are you shipping your game?
Now at the start of a project, you should document. Please, please write down what you think the game should be!
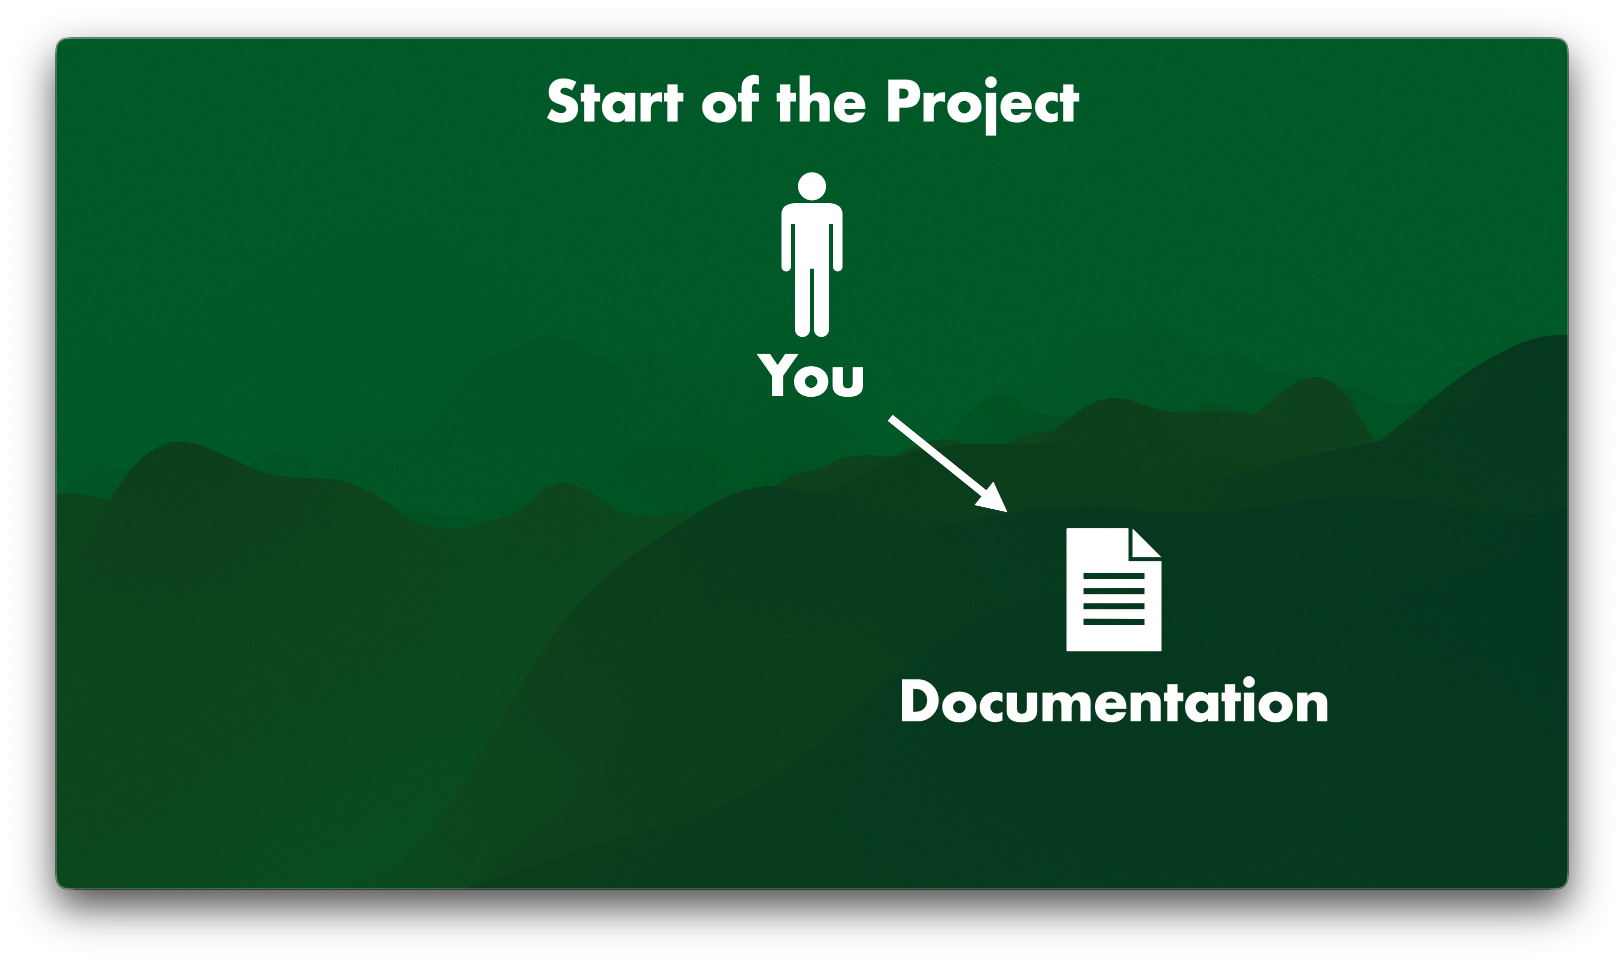
The start of the project, you are documenting your game
But eventually you start building and experimenting inside the engine. You start to fully focus on the game.
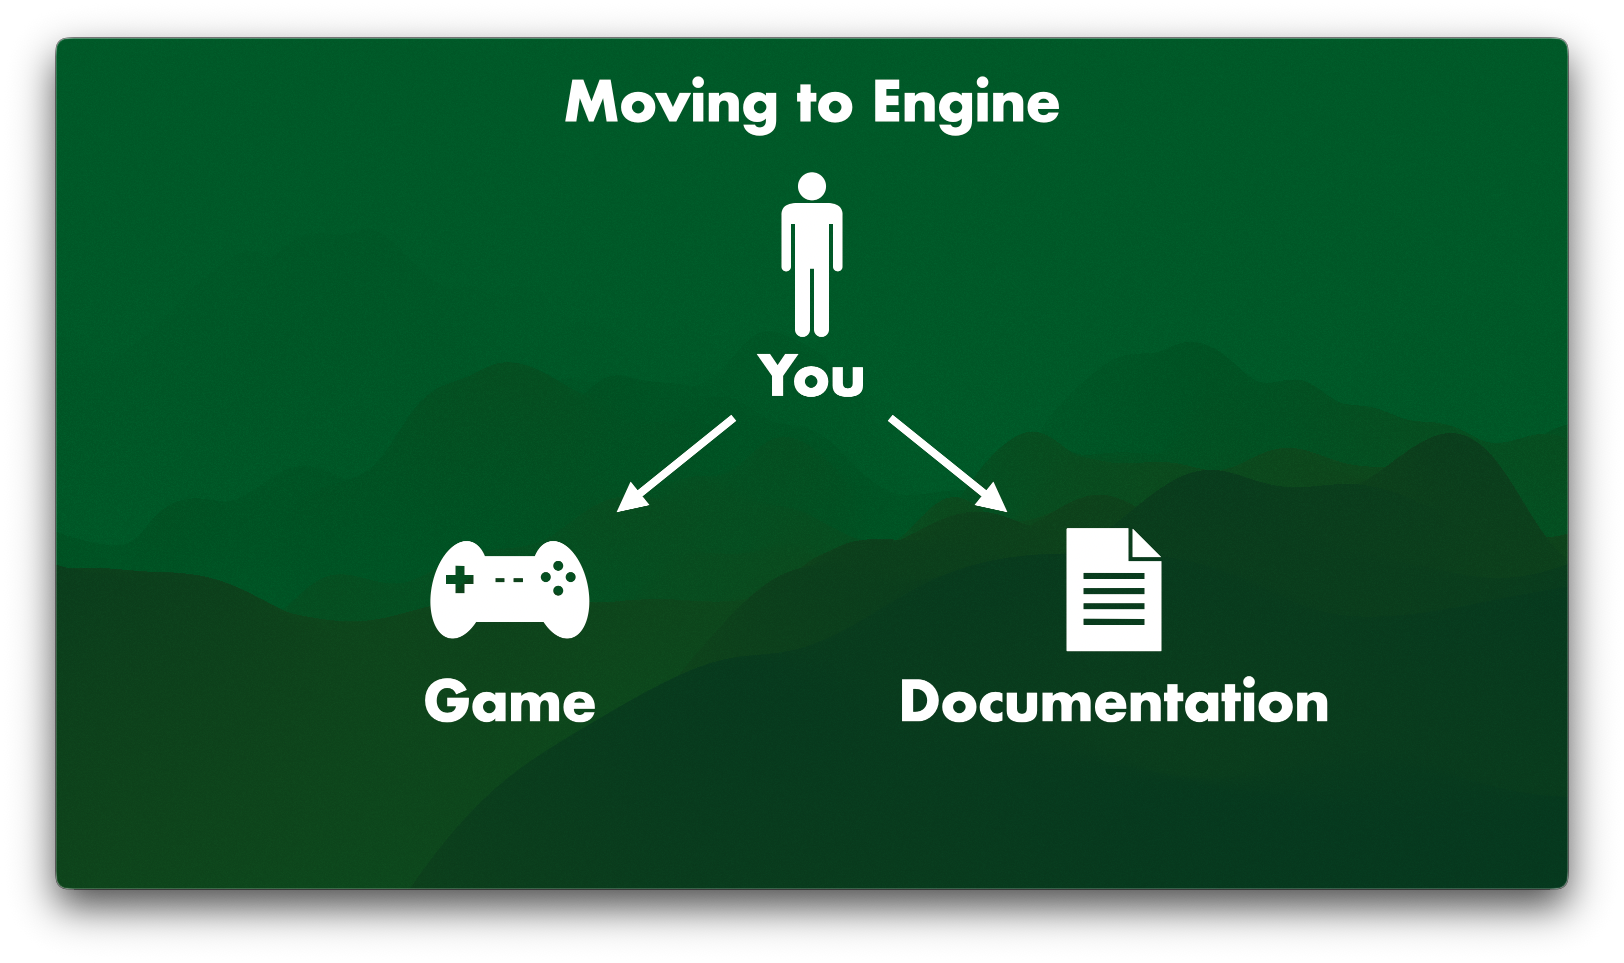
You are updating the game and documentation separately
Which means over time, you start to forget to update your documentation, and the documentation slowly but surely never gets updated anymore.

You stop updating the documentation.
At that point, because you are so busy in the game itself, the documentation goes out of date, slowly, but surely.
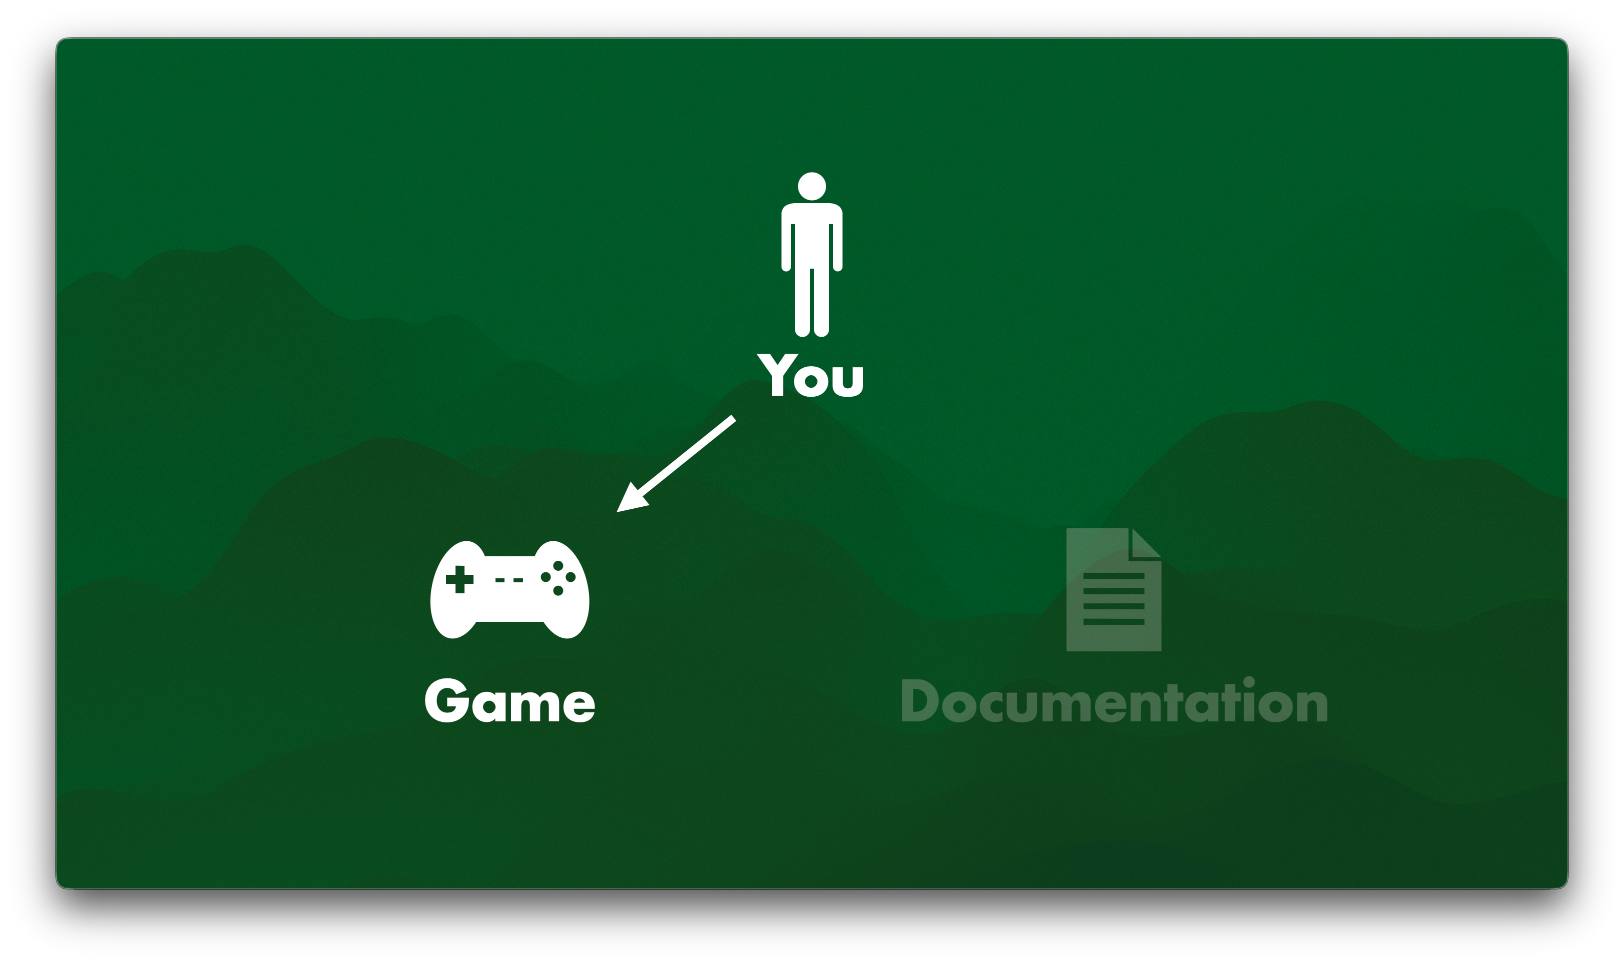
The documentation is out of date
At that point, someone will say:
“Oh no! The documentation is out of date!”
Don’t worry, that’s normal. Again, iteration & change is expected. But, updating documentation should be easy, not hard. To make it easy, you should document your game, in-game. Spatially & contextually close to your content. So instead of updating both your game and your documentation separately, you build and document the game at the same time.
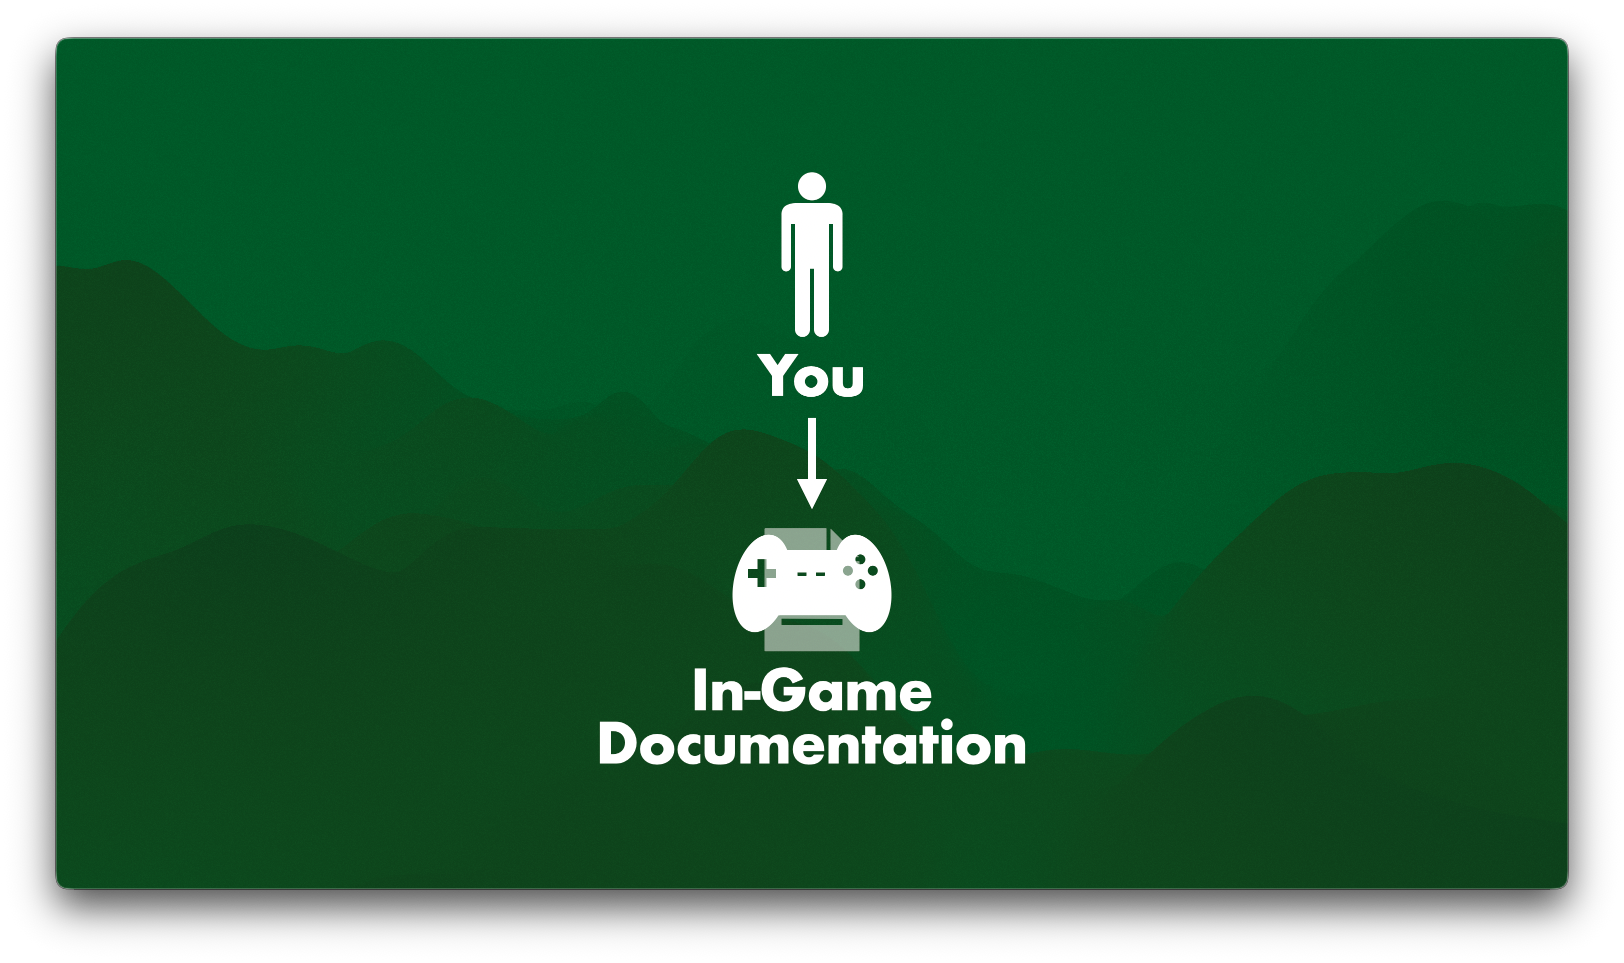
Updating one thing: The in-game documentation
This is a core tenet of workflow design: Working in-context.
Now of course updating in-game documentation still takes time. But, now you are updating one thing instead of two.
There are a couple of ways to build in-game documentation. The ones I recommend are: Gym, Zoo, and Museum. You may know these under different names. such as: ‘Test map’, ‘Metrics World’, ‘Showcase’, ‘Playground’, ‘Test level’, ‘Whiteroom’, ‘PlayerZoo’, ‘Gallery’, ‘Mechanics Garden’, ‘Workshop’, and many more. For ease of use I would urge you to stick only to the main ones, which were established way back in the 90s: Gym, Zoo, and Museum.
Let’s take a look through them, one at a time!
Chapter 1: Gym
This is for character controllers, for player movement, and for character animation.
Here is an example of the game animation sample from Unreal 5. You can just download this for free and try it out:
We can see the character can run around, and we have some metrics that show things like ‘This is one meter’. You can jump over things, to see how that works. There is something that is two and a half meters, and you can climb onto it. So, a Gym allows you to understand the character controller very easily and quickly. I can also teleport to another place, and do some more testing in a different area.
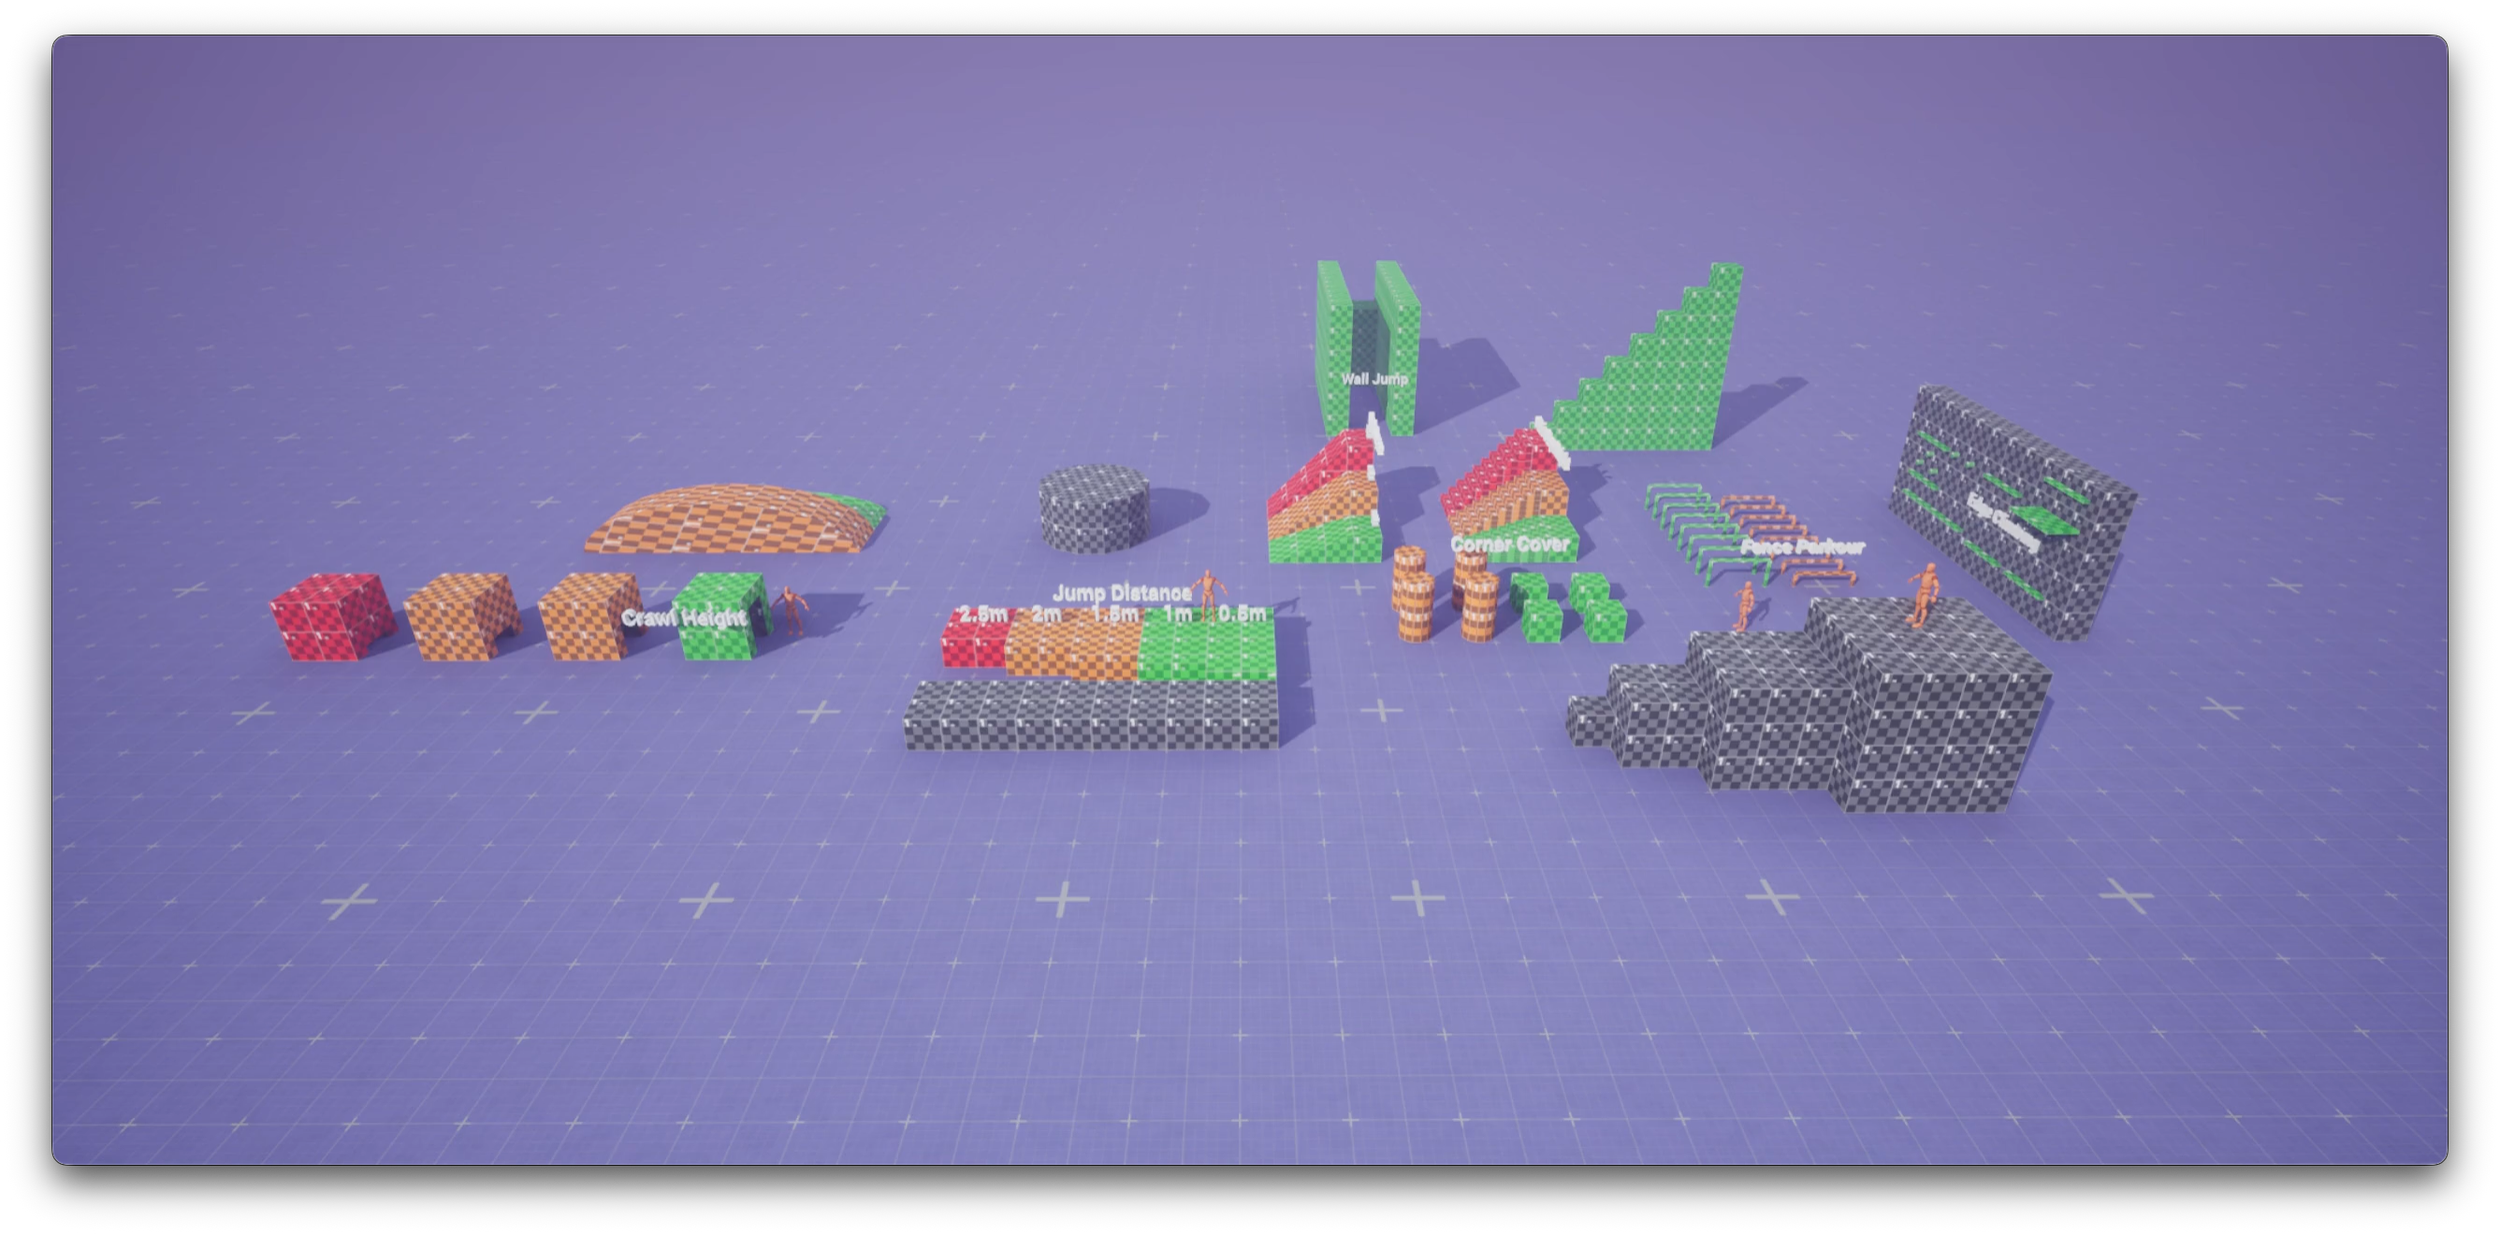
Usually Gyms are not released to the public, they stay internal during development. So I have created a little gym myself that showcases the usual elements.
Such as jump distances. Green is a good distance, that’s easy. Orange is hard but possible. Red is too difficult. It is too far away to jump. You can just hit play and run through this Gym, make that jump, see how it functions, and understand it.
There is also corner cover. Green is great, while these round ones are orange. You know how in Assassin’s Creed you can run along fences? We can see how easy it is to try that out here. Edge climbing, is another big one that happens a lot in games. How far can an edge be? How far can the player vault? It’s all there.
Instead of textual documentation, you get all of that in a gym. So when someone asks “How far can a player jump?”, instead of giving them loads and loads of documentation, having to find that one table somewhere that has the metric, it being out of date, yuck, instead you ask them to check the gym instead.
Some games also release gyms, as a ‘shooting range’, or something like that. Here is one from Overwatch 2.
You can load in with any character you want, and then you can start shooting things to see how they work. You can pick up an item and see how it functions. For example, I instantly have my ultimate ready when picking up the blue item. I can also shoot whatever enemy I want, by going into this computer and selecting my enemy.
I do not have to know what console command to use for what enemy, or what their internal codenames are, I can simply visually select them. Then I can use an ability, and boom, there it is. This is not just useful for game players, who sometimes use such Gyms to make videos documenting your game for you, this is also useful for game developers.
Or, as Jan David Hassel once told me: “You can’t ship a game, without hitting the gym”
A Gym is also helpful for smoke testing, and other automated testing. For example: Let a character run through the Gym overnight. Does the character get stuck? Is there a problem somewhere? Now we can tell everyone: ”Hey, this character got stuck. This build does not pass the smoke test, so please do not give it to other people. We have to fix this first." and we can know where the problem happens. Thanks to the Gym we can also easily verify that!
So when someone asks: “How far can a player jump?”, check the Gym, and you have your answer.
What is the maximum terrain angle? Check the Gym, and you have your answer.
How much damage does that ability do? Check the Gym, and you have your answer.
So, a gym allows you to have a single source of truth.
I want to very clear here: I am not saying: “Don’t document”. I am saying: “Know what to document where”. Because Engineers love reading text documentation. especially for APIs. Artists and Designers, on the other hand, will not read written documentation. With extremely few exceptions, such as narrative designers. This is also why I think generally narrative tools have such bad UX, because the user base of narrative tools more readily reads docs and is more able to get around bad design, but that is a story for another time.
So, what makes a good Gym?
It has test cases for all major character (environment) interactions.
It has descriptions of metrics.
It has color coding & text.
And it has teleportation & ease of use.
That was chapter 1, the takeaway being: Use gyms!
Chapter 2: Zoo
This is for for 3D art assets, items, and NPCs, for VFX, audio, materials, for vignettes, and art directors. First, let me show you why you need a Zoo.
A classic problem for asset browsers is that you have a bunch of thumbnails.
Various asset thumbnails in an asset browser
Look at the siege tower and the rocks above it, we have no idea which asset is larger. The siege tower is a little bit larger in the thumb, but how much larger? We cannot tell. In fact we have no idea what the scale of any of these assets are. Also, what do they look like in the lighting of the level we are building? What does it look like in the dark or at sunset? We do not know.
Now, there's some cool things that, for example, Unreal does, to combat this problem. You can click and rotate a thumbnail to see what an asset looks like, right there in the asset browser. That’s cool!
But still, that rock and that ballista, are they the same size? Are the stairs the same size? By rotating the asset I can see what the bottom of a siege ram looks like: Bam. There it is. That's nice, but I still can't see exactly what its scale is.
By the way thank you to Kenney for these creative commons 0 assets. Thank you so much for all the work you do. It's absolutely fantastic.
Next, I am going to go over to some other assets. In Unreal, for example, here is a Zoo.
In the Zoo I can see what the assets look like. I can see what their scale is. I can see what they look like in lighting. You instantly see this information, so you know right away if this will fit your current level, creation, scale, and style. I could even set up a day-time cycle here and check it out in various lighting environments, such as night time. And what is really awesome as well is I can also zoom in on this much further. I can see the detail of the assets. Like, oh, there’s parallax on this material. Lovely! That is information I cannot see in the thumbnail of an asset browser.
And what is nice as well for art directors specifically is you can set up little vignettes next to the zoo to showcase how the assets are supposed to be used. So anyone can see: This is how you put those assets together and make sure you stay consistent to the intended art style.
So instead of asking questions like: What’s the name of that item? Or wondering if you have to type /spawn -cr 1284 into a console to make it appear.
Asking what’s the name of that vendor NPC? Or what level are they in again? Do I have to spawn in to city_sewers_2_7 at X125 Y279 Z10?
Which are important questions, but take ages of time to answer. They are games of telephone. With way too much time and effort spent to get answers.
Another big problem is asset names. For example, what would you type into an asset browser to find this asset? Think of some names, what would you type to find this?
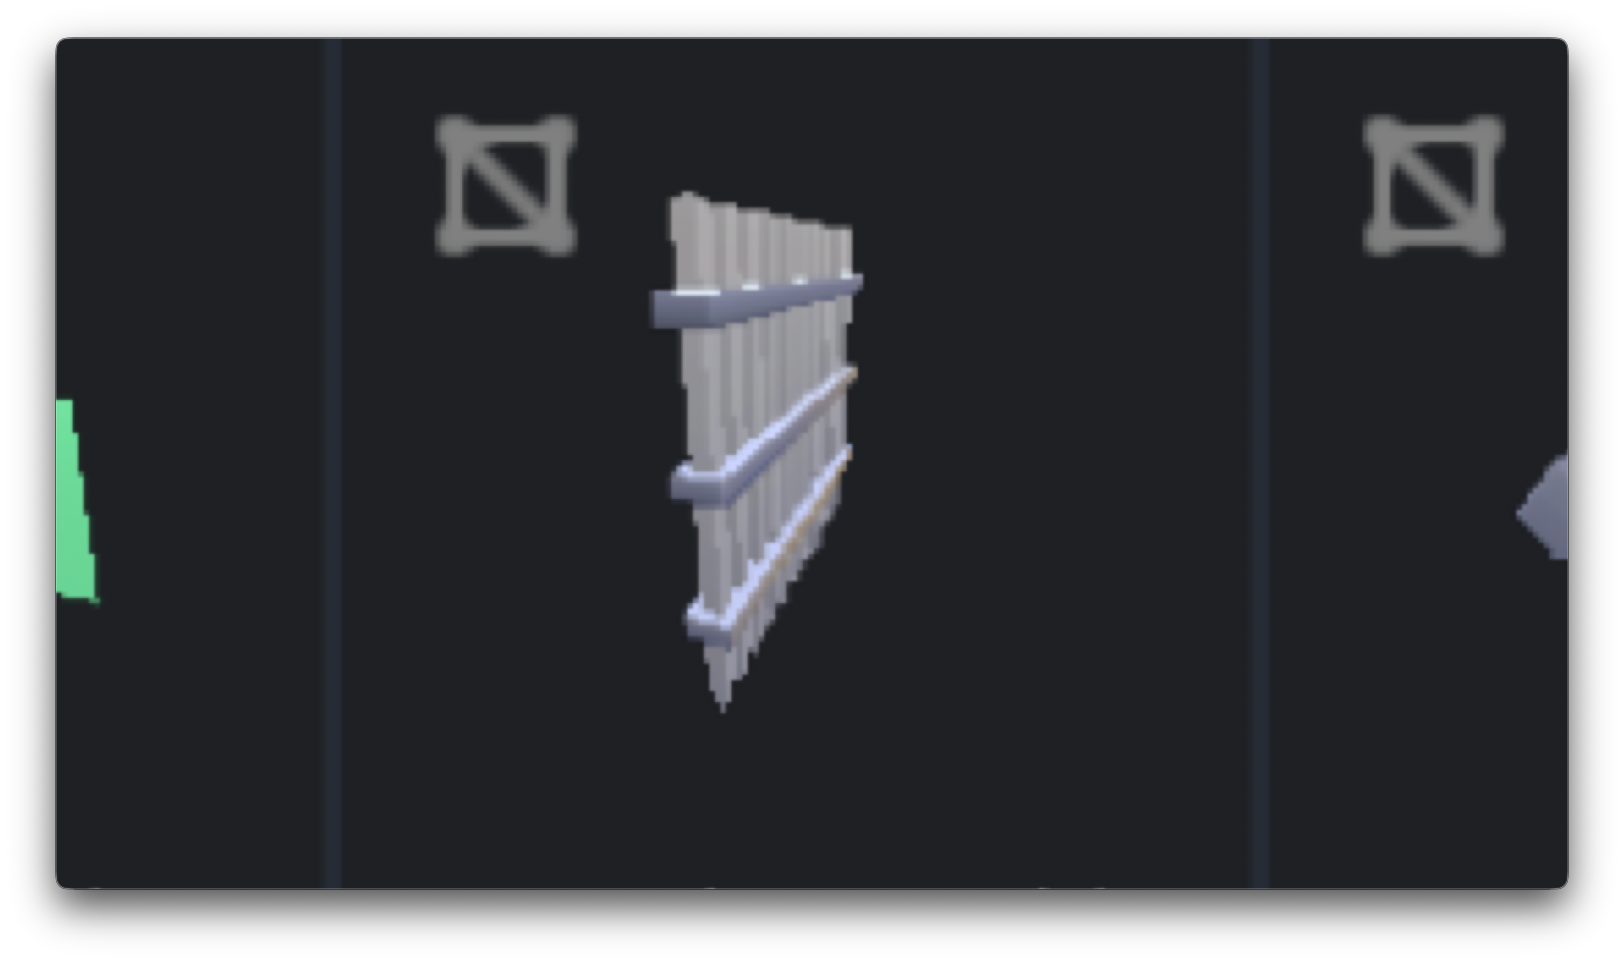
An asset in an asset browser
Iron gate? Steel gate? Turns out it’s called…
The same asset, with its name: Metal-gate.obj
Metal-gate.
Now what is the difference between metal, steel, and iron? Does it really matter? Only ever searching assets by name is a bad idea, as assets quickly get lost, and sometimes even get rebuilt just because they cannot be found by name. With a Zoo, you do not have to deal with those problems, and it saves a lot of time.
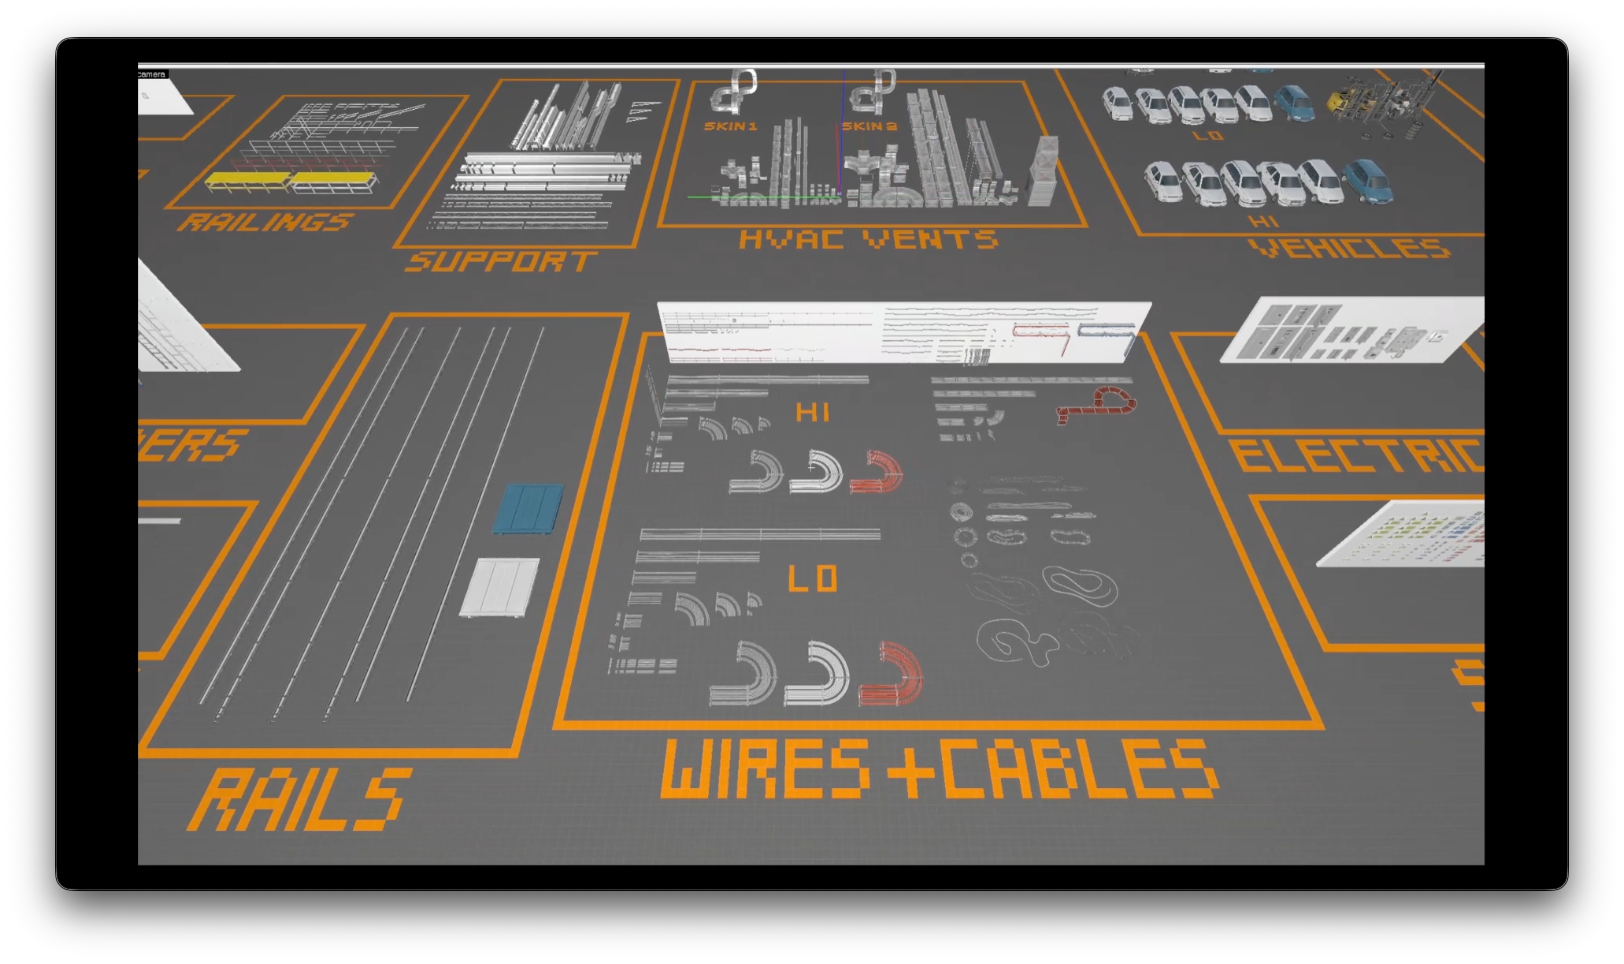
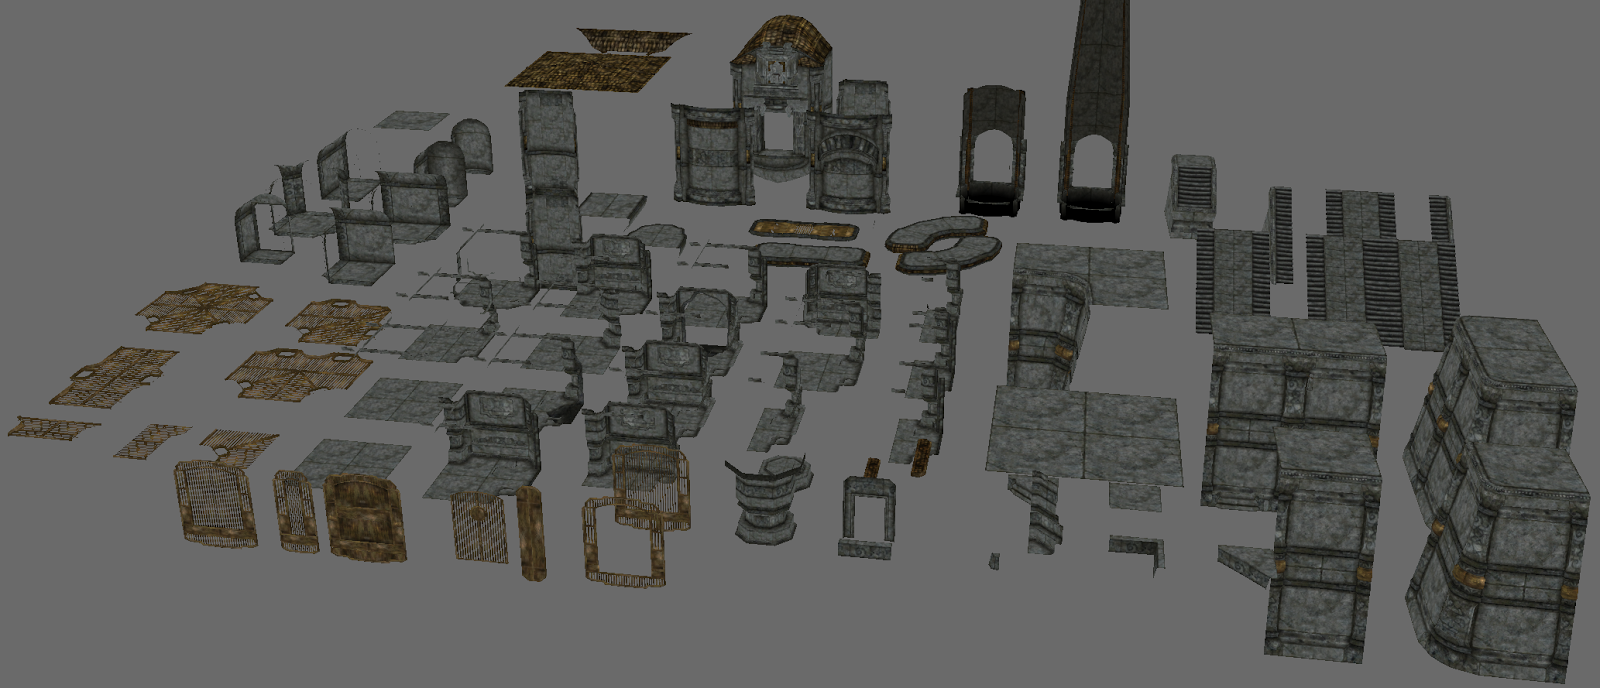
Here is a Zoo from Counter-Strike: Global Offensive, for level de_nuke, which Valve released.
You can even see with little text like, oh, these are the roof trims. What are the names of those roof trims? I do not care. I do not need to know any of their names to search for them. I can just look at the assets and pick the right one. Or these wires and cables, same thing. There are high poly and low poly versions. I can see all of them in the blink of an eye. You can instantly understand what you need to grab. No single name you have to remember. No single asset getting lost.
(As a bonus for this textual article, here is another Zoo by Valve, also for Counter-Strike: Global Offensive, called de_aztec)
Of course, you can grab data such as which assets are low and high poly programmatically where possible, or material complexity, health, LODs, and then show that data in engine next to the asset, in the Zoo.
Again, Zoos are usually not released to the public, but… here's one from Overwatch! This is a like three second segment from a YouTube video they once published. I was like, "Oh my god, there is a zoo in there!” I have to take a picture!
A Zoo from Overwatch
And here is another Zoo I saw in a talk by Larian, for Baldur’s Gate 3.
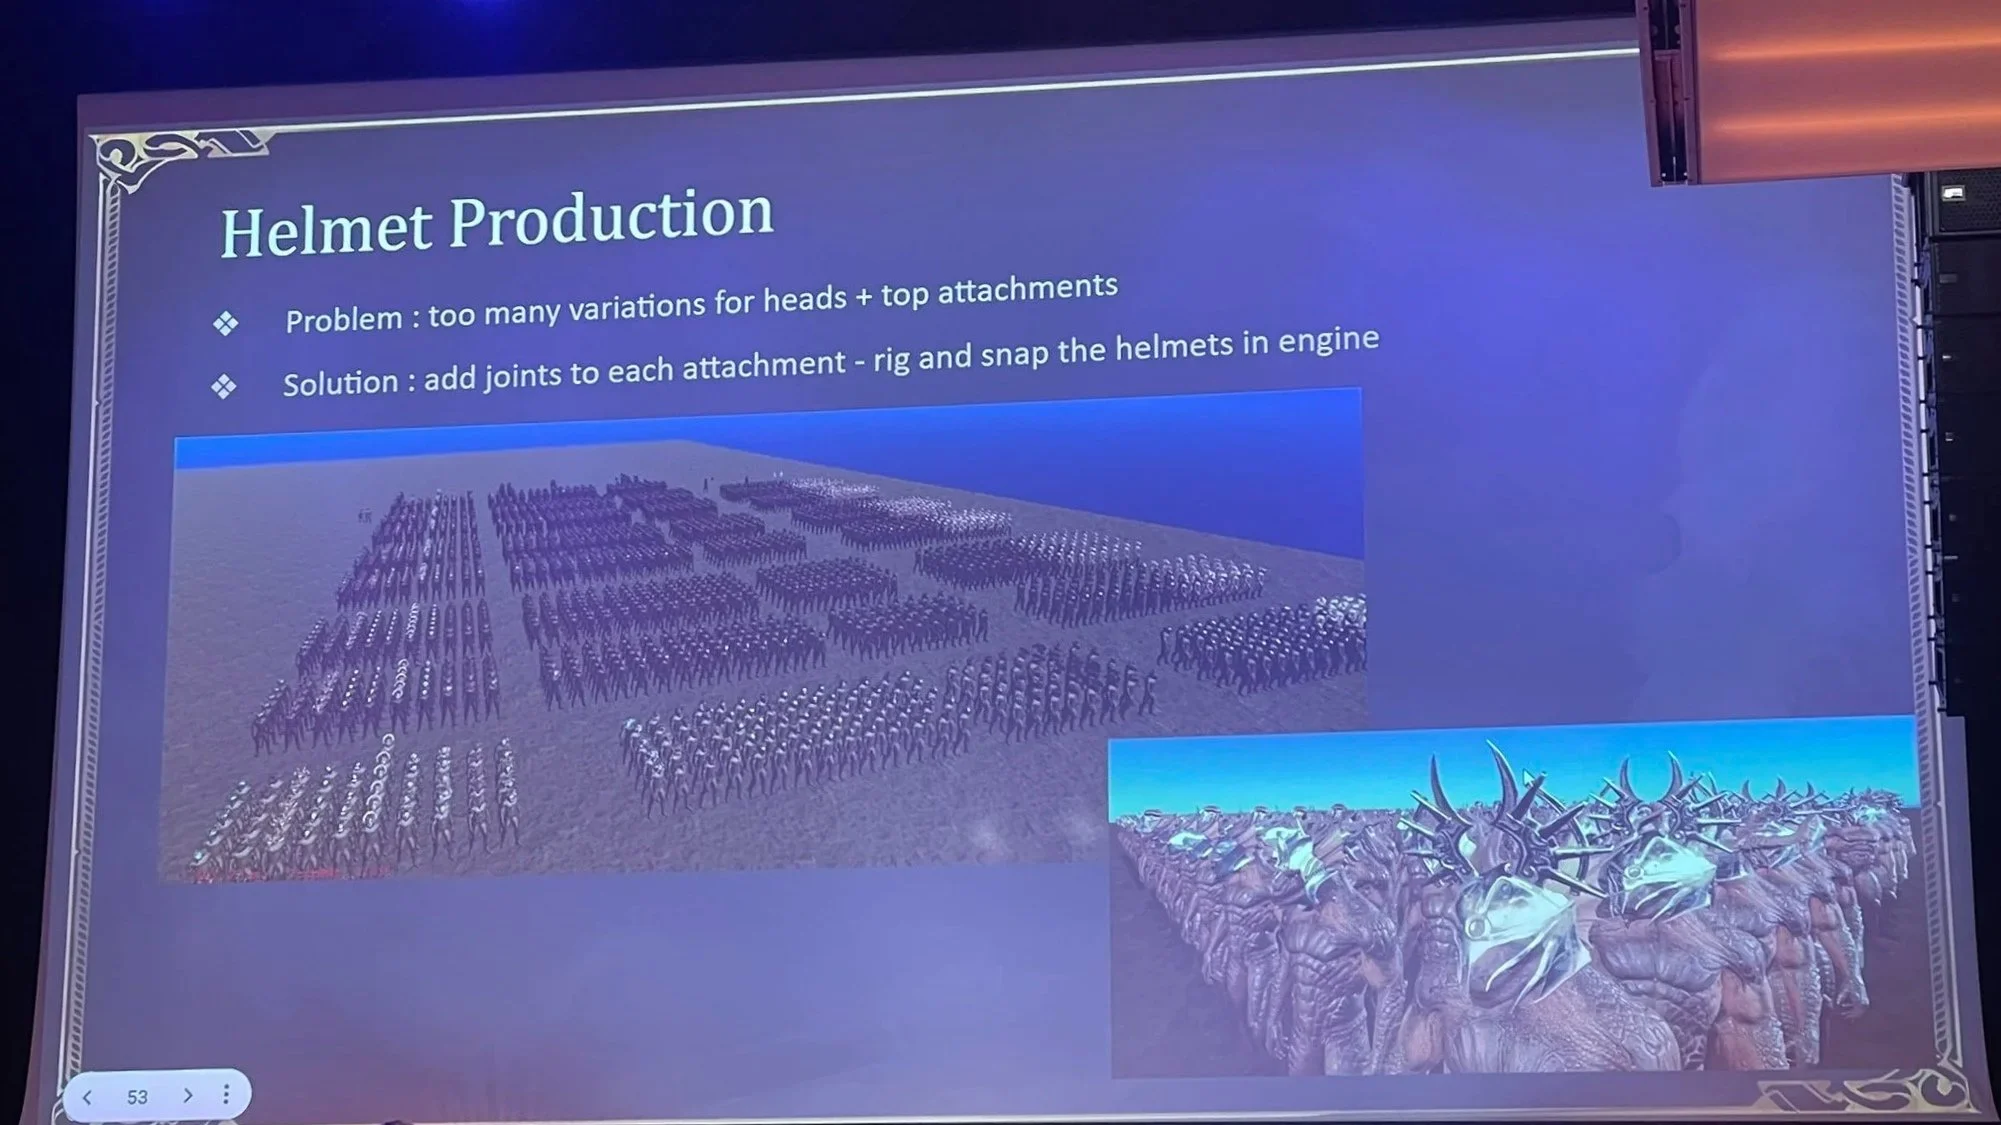
Helmet Production, with many characters being shown wearing helmets
You can see in one level how every single helmet fits to every body type, facial structure, etc. Instead of having to spawn or load each one, you can see all of them right away, great! Imagine how much longer this would take by having a single small previewer window and clicking from one body type to the next. What a waste of time!
And here is one from a blog post and talk that Joel Burgess did about level design workflows for Skyrim at GDC 2013:
A Dwarven Zoo of Dwarven Skyrim Assets, by Joel Burgess
But, Zoos are not just useful for 3D models. They can have so much more. You can also make Zoos for VFX. For example, here is a Zoo from Skin Deep by Blendo Games.
We can instantly see all the VFX playing. Instead of one by one in some previewer. So we can see what we would like use, fly closer to it, see its name, and then grab it. “Oh, the electric defib VFX asset. I love using that. That looks, and sounds, fantastic.”
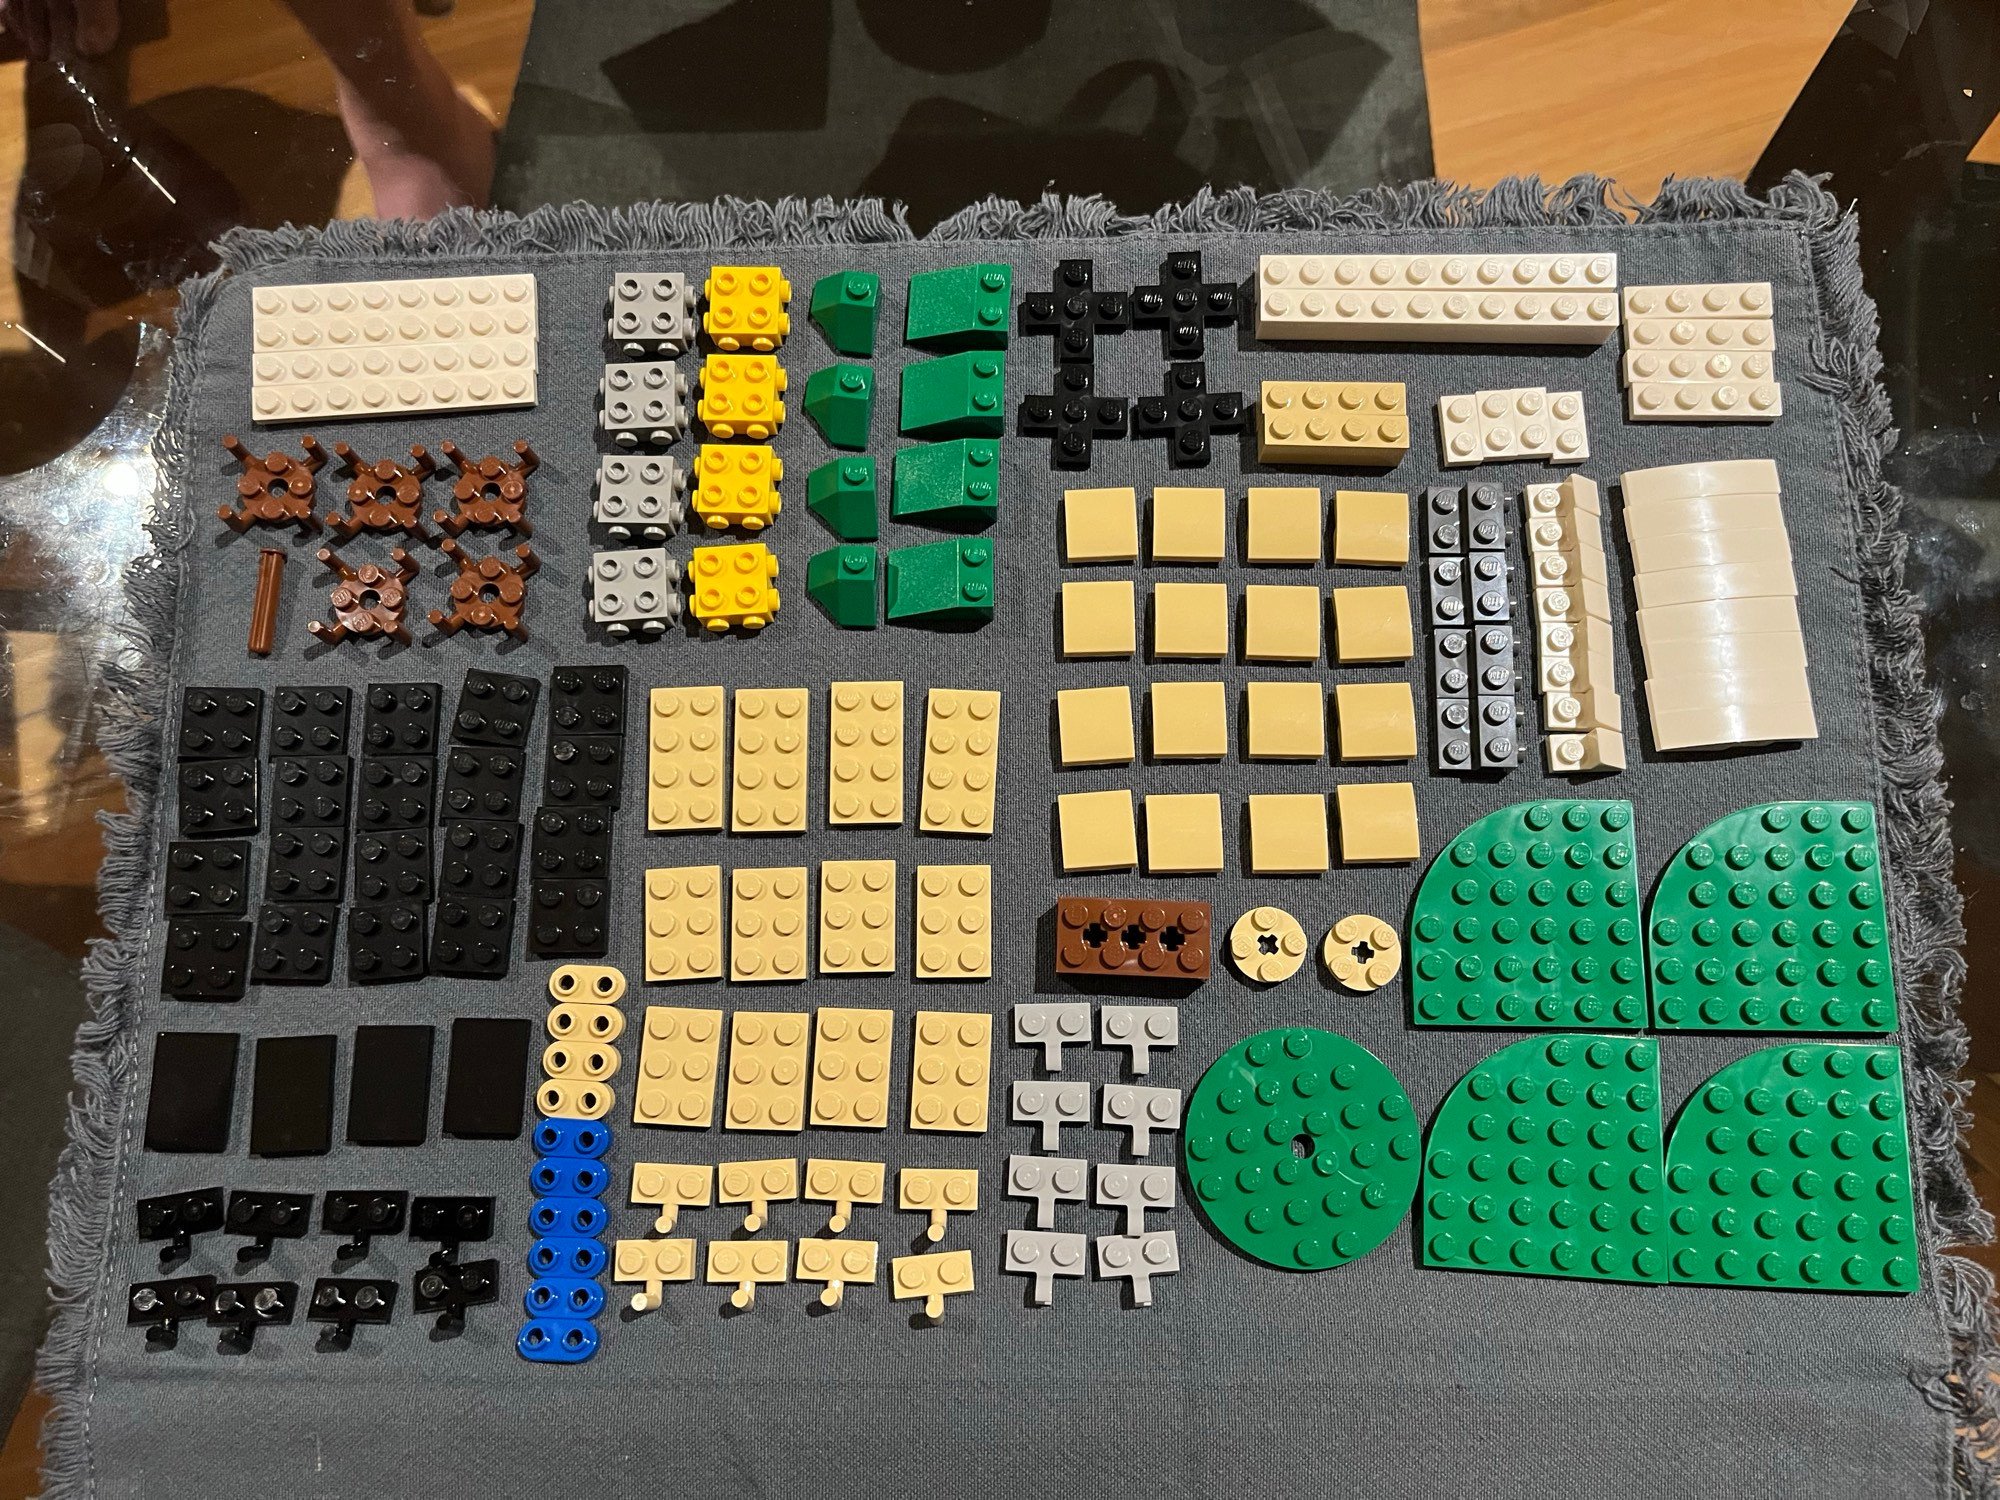
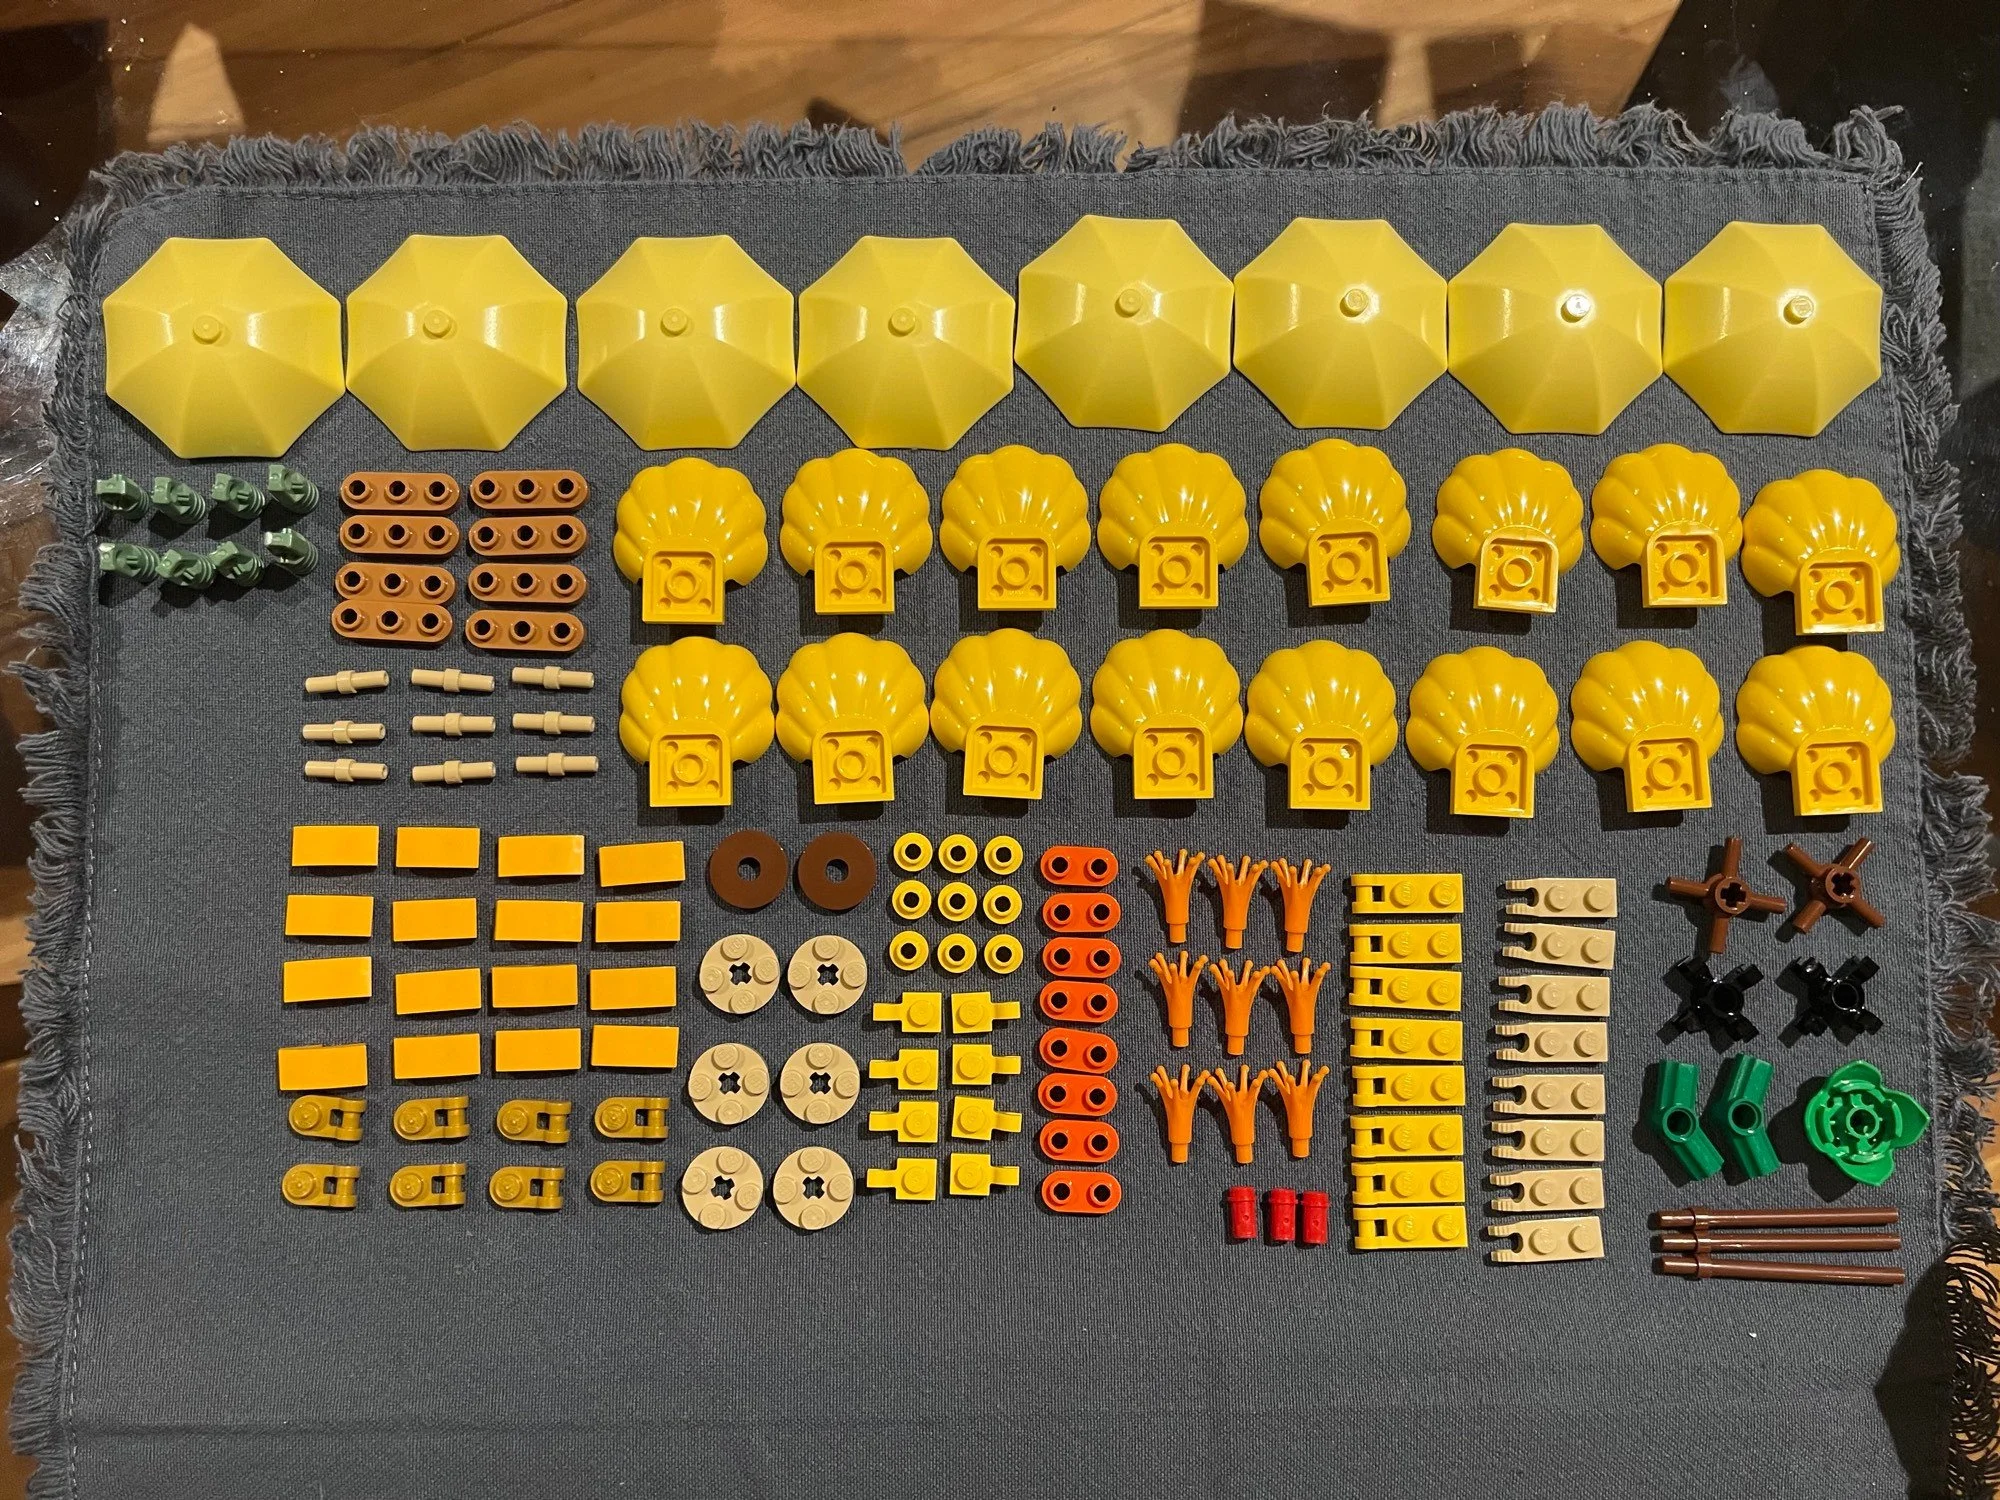
This process of laying out assets goes back long ago, to physical objects and tools. Physically this is called ‘Knolling’, which seems to have been coined by Andrew Kromelow in the 1980s.
For example, here is a physical LEGO creation, knolled by Wren Brier.
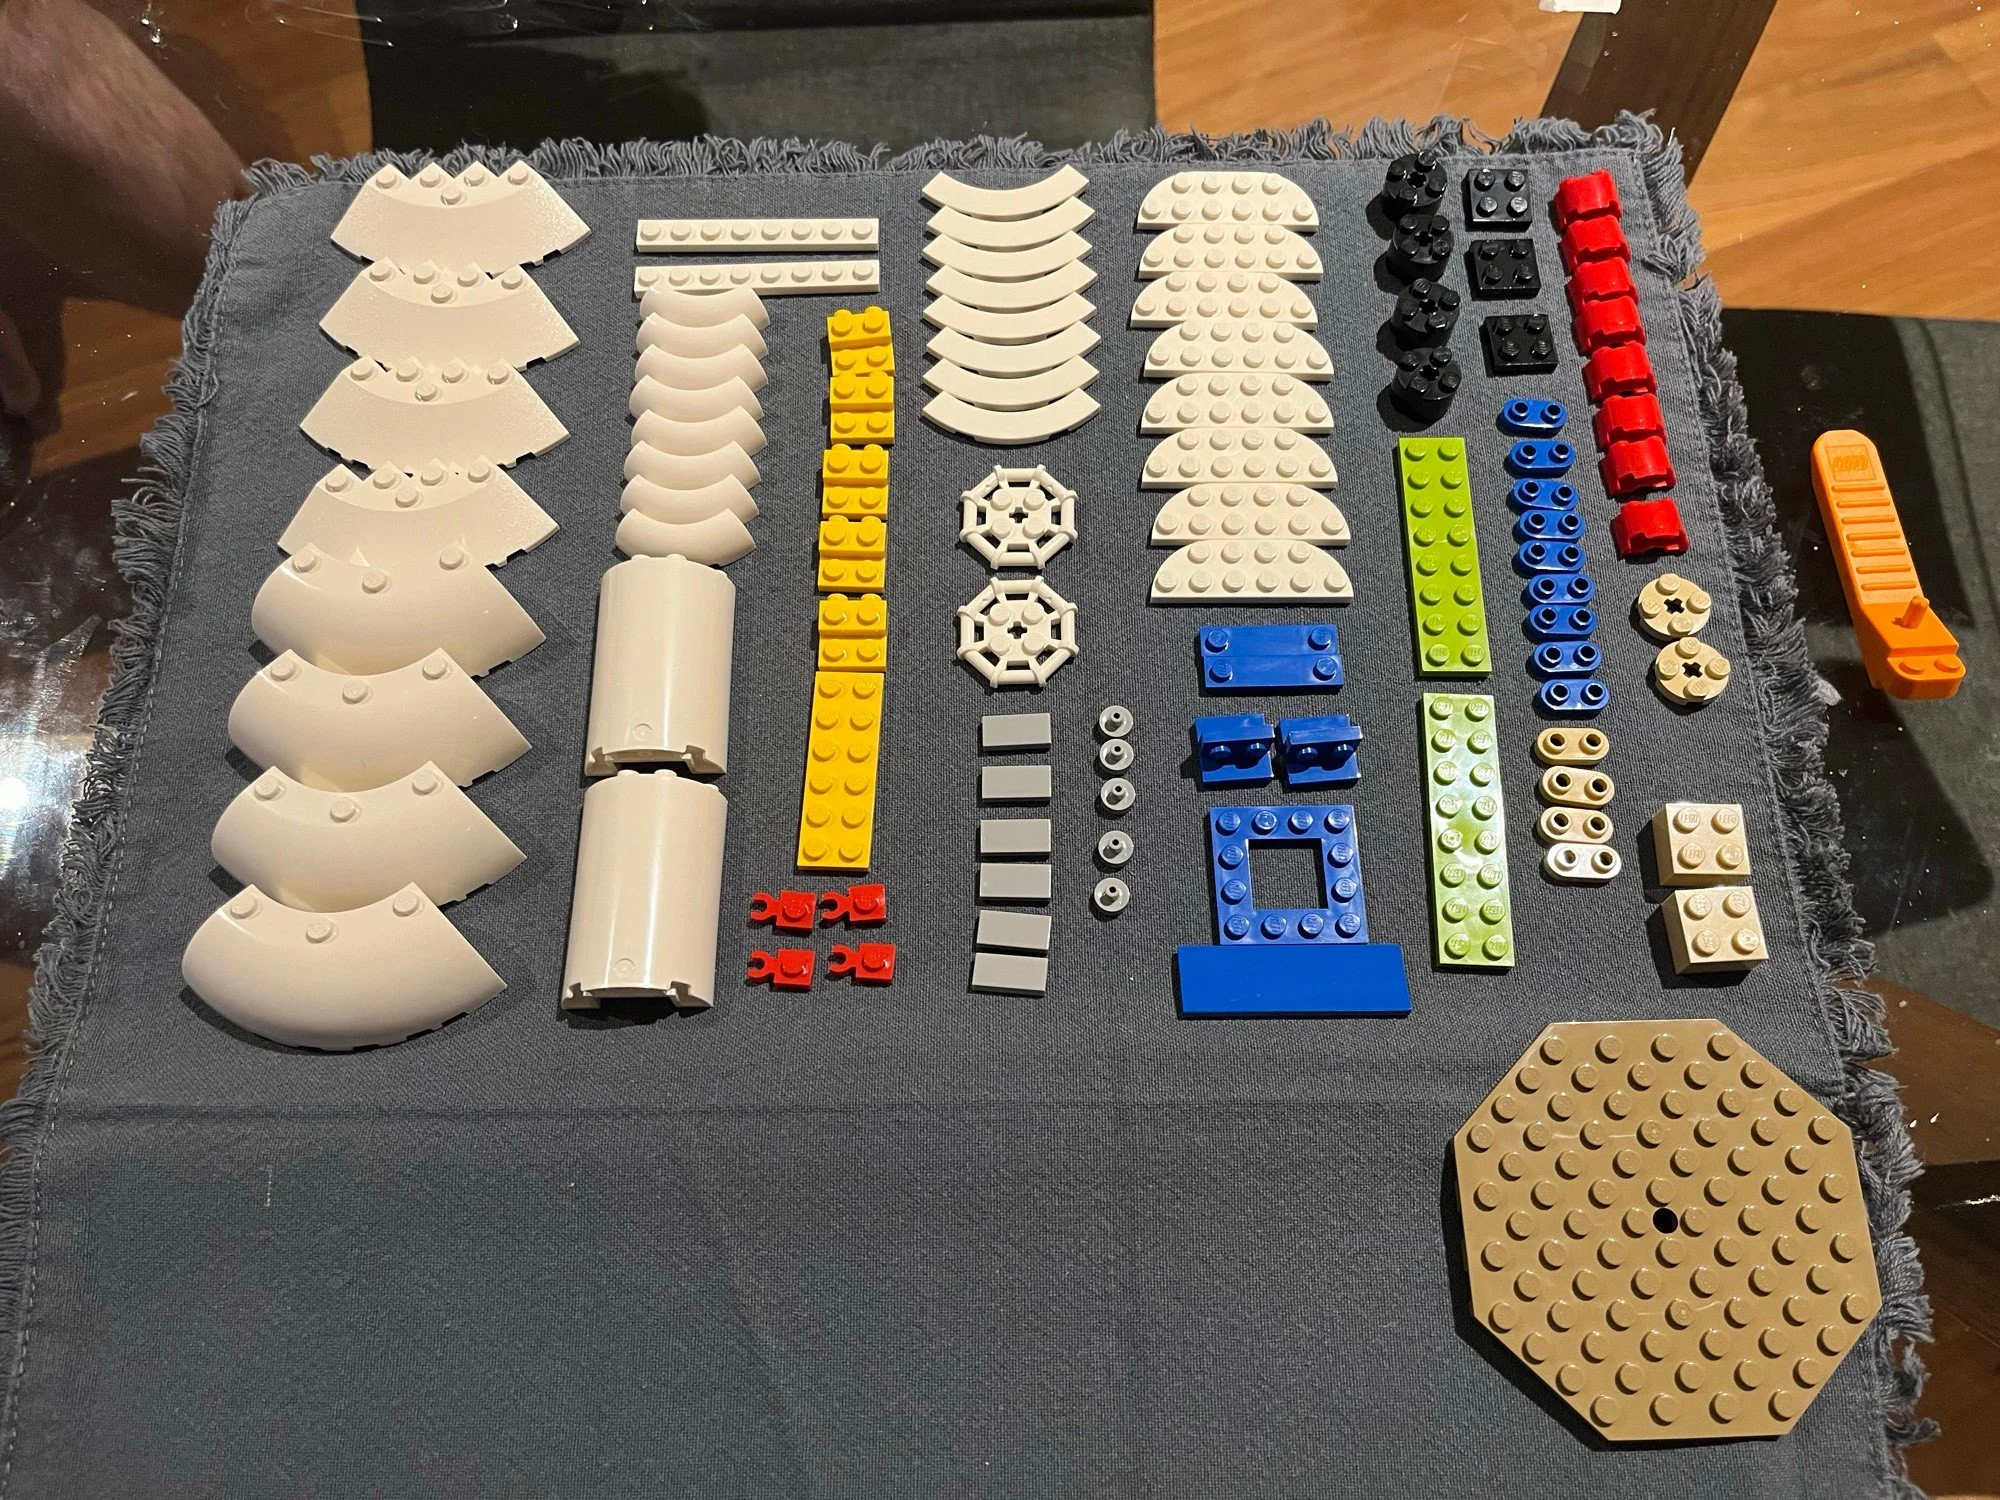
LEGO creation, knolled by Wren Brier
And the result of that creation.
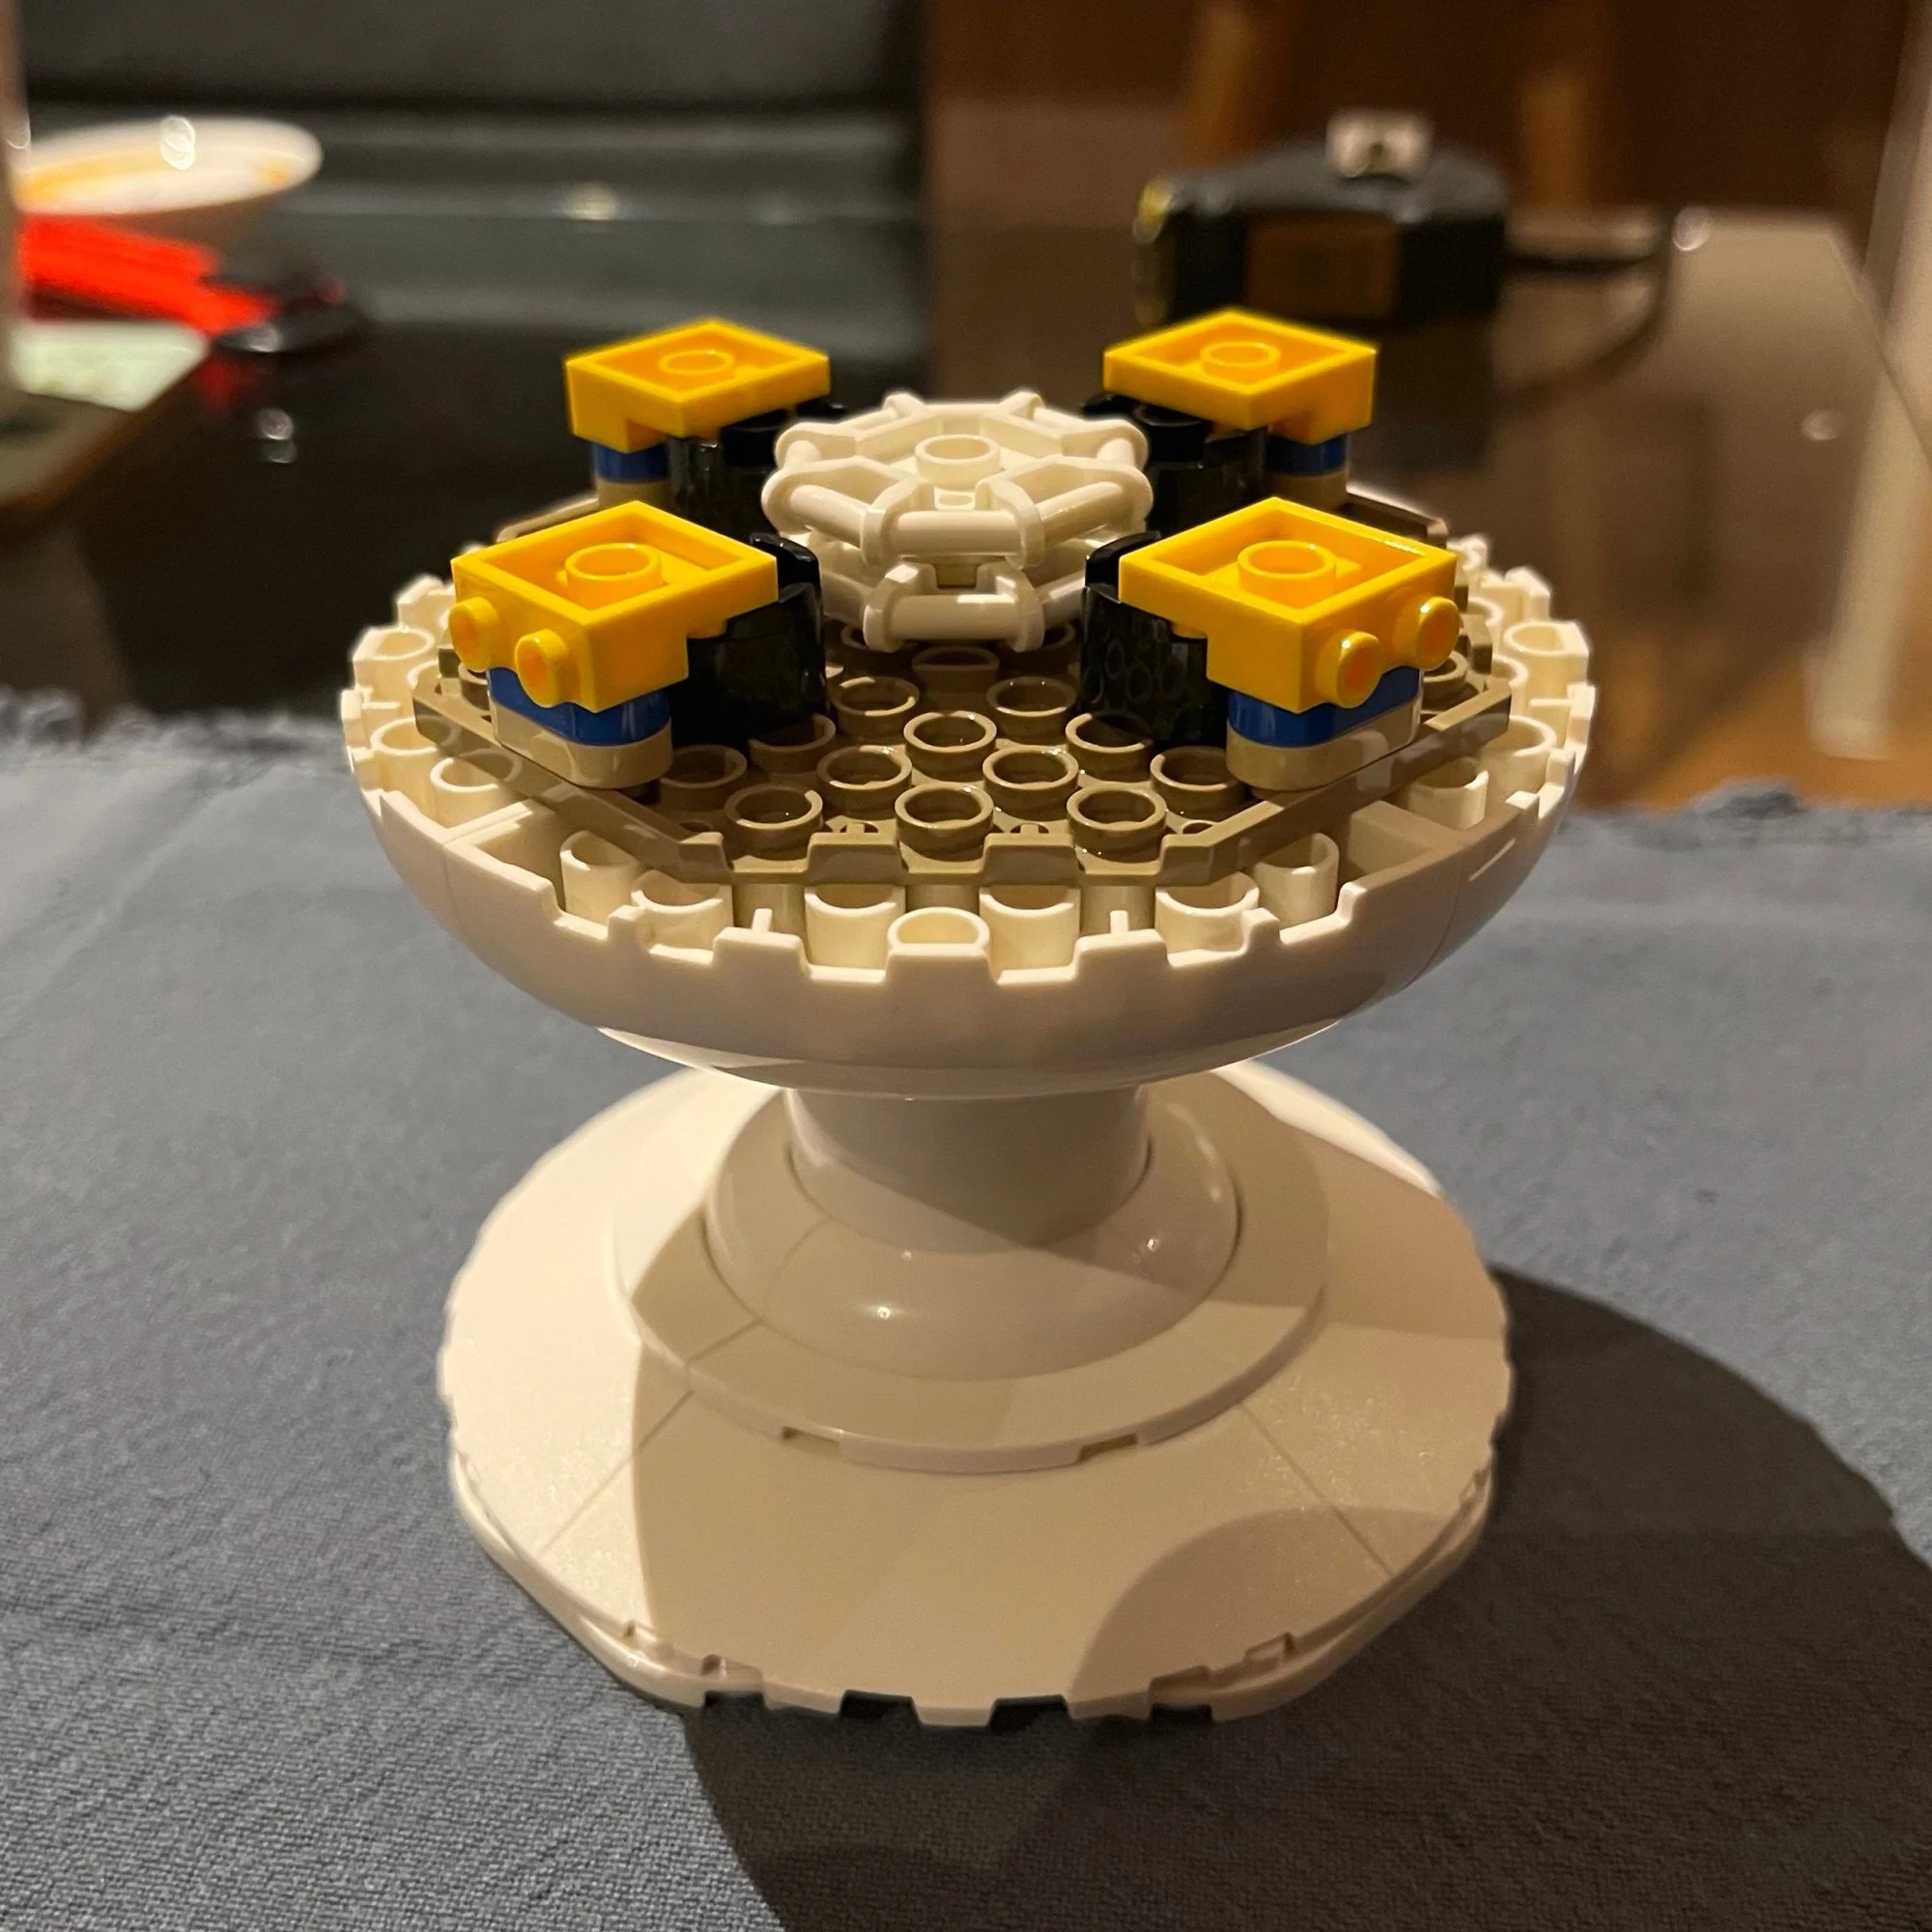
LEGO creation, knolled by Wren Brier
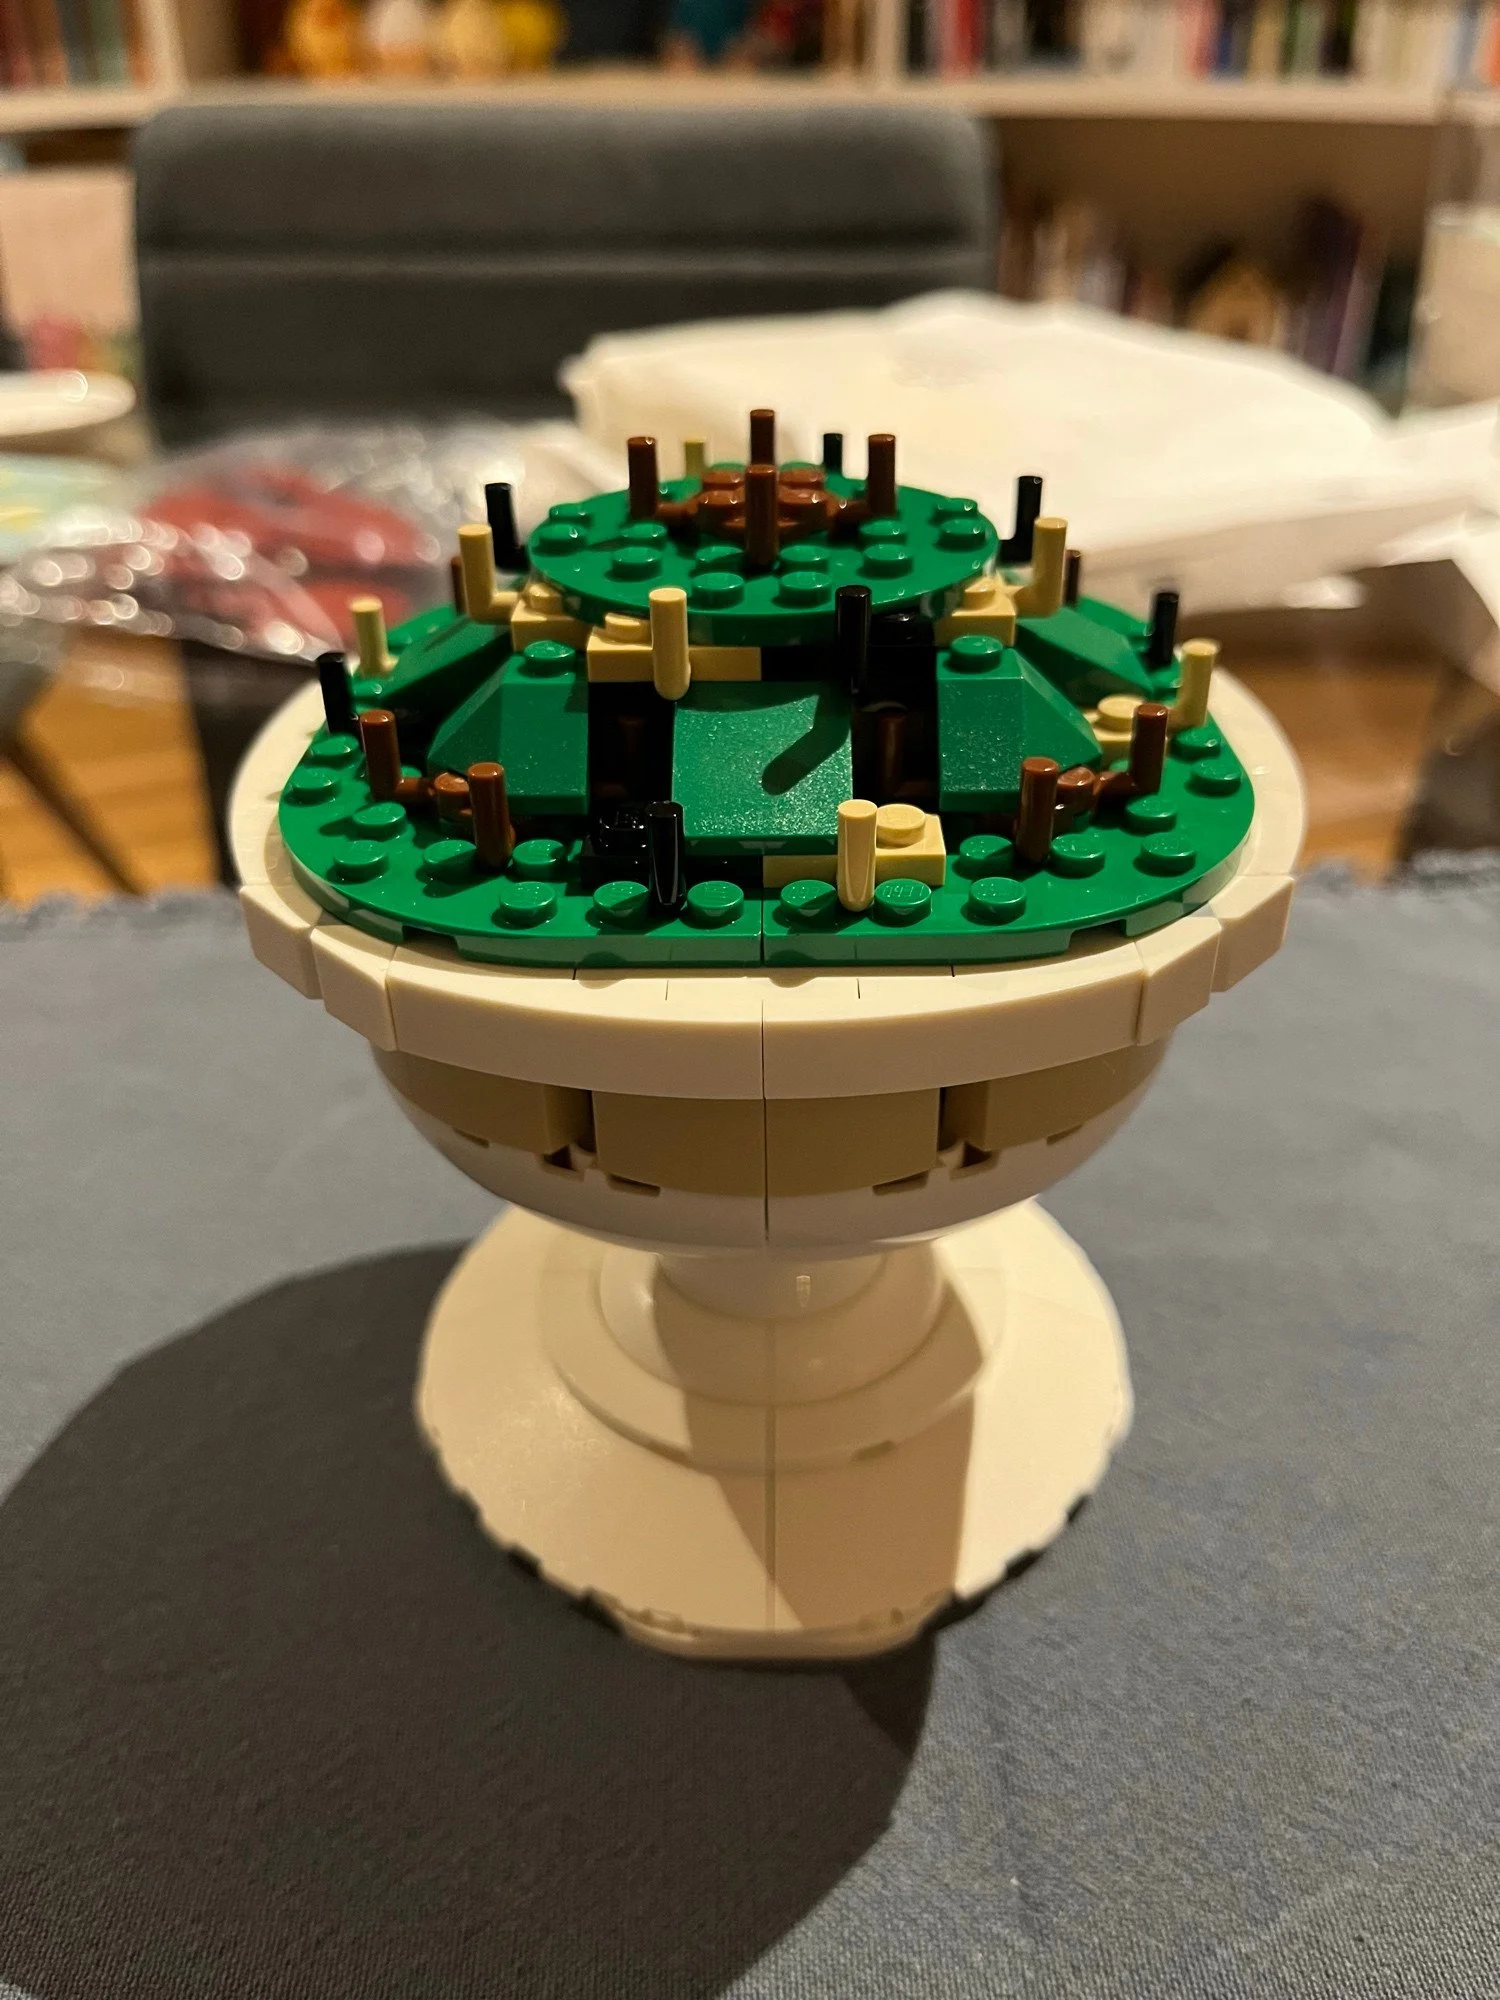
Then more knolling.
LEGO creation, knolled by Wren Brier
And more building.
LEGO creation, knolled by Wren Brier
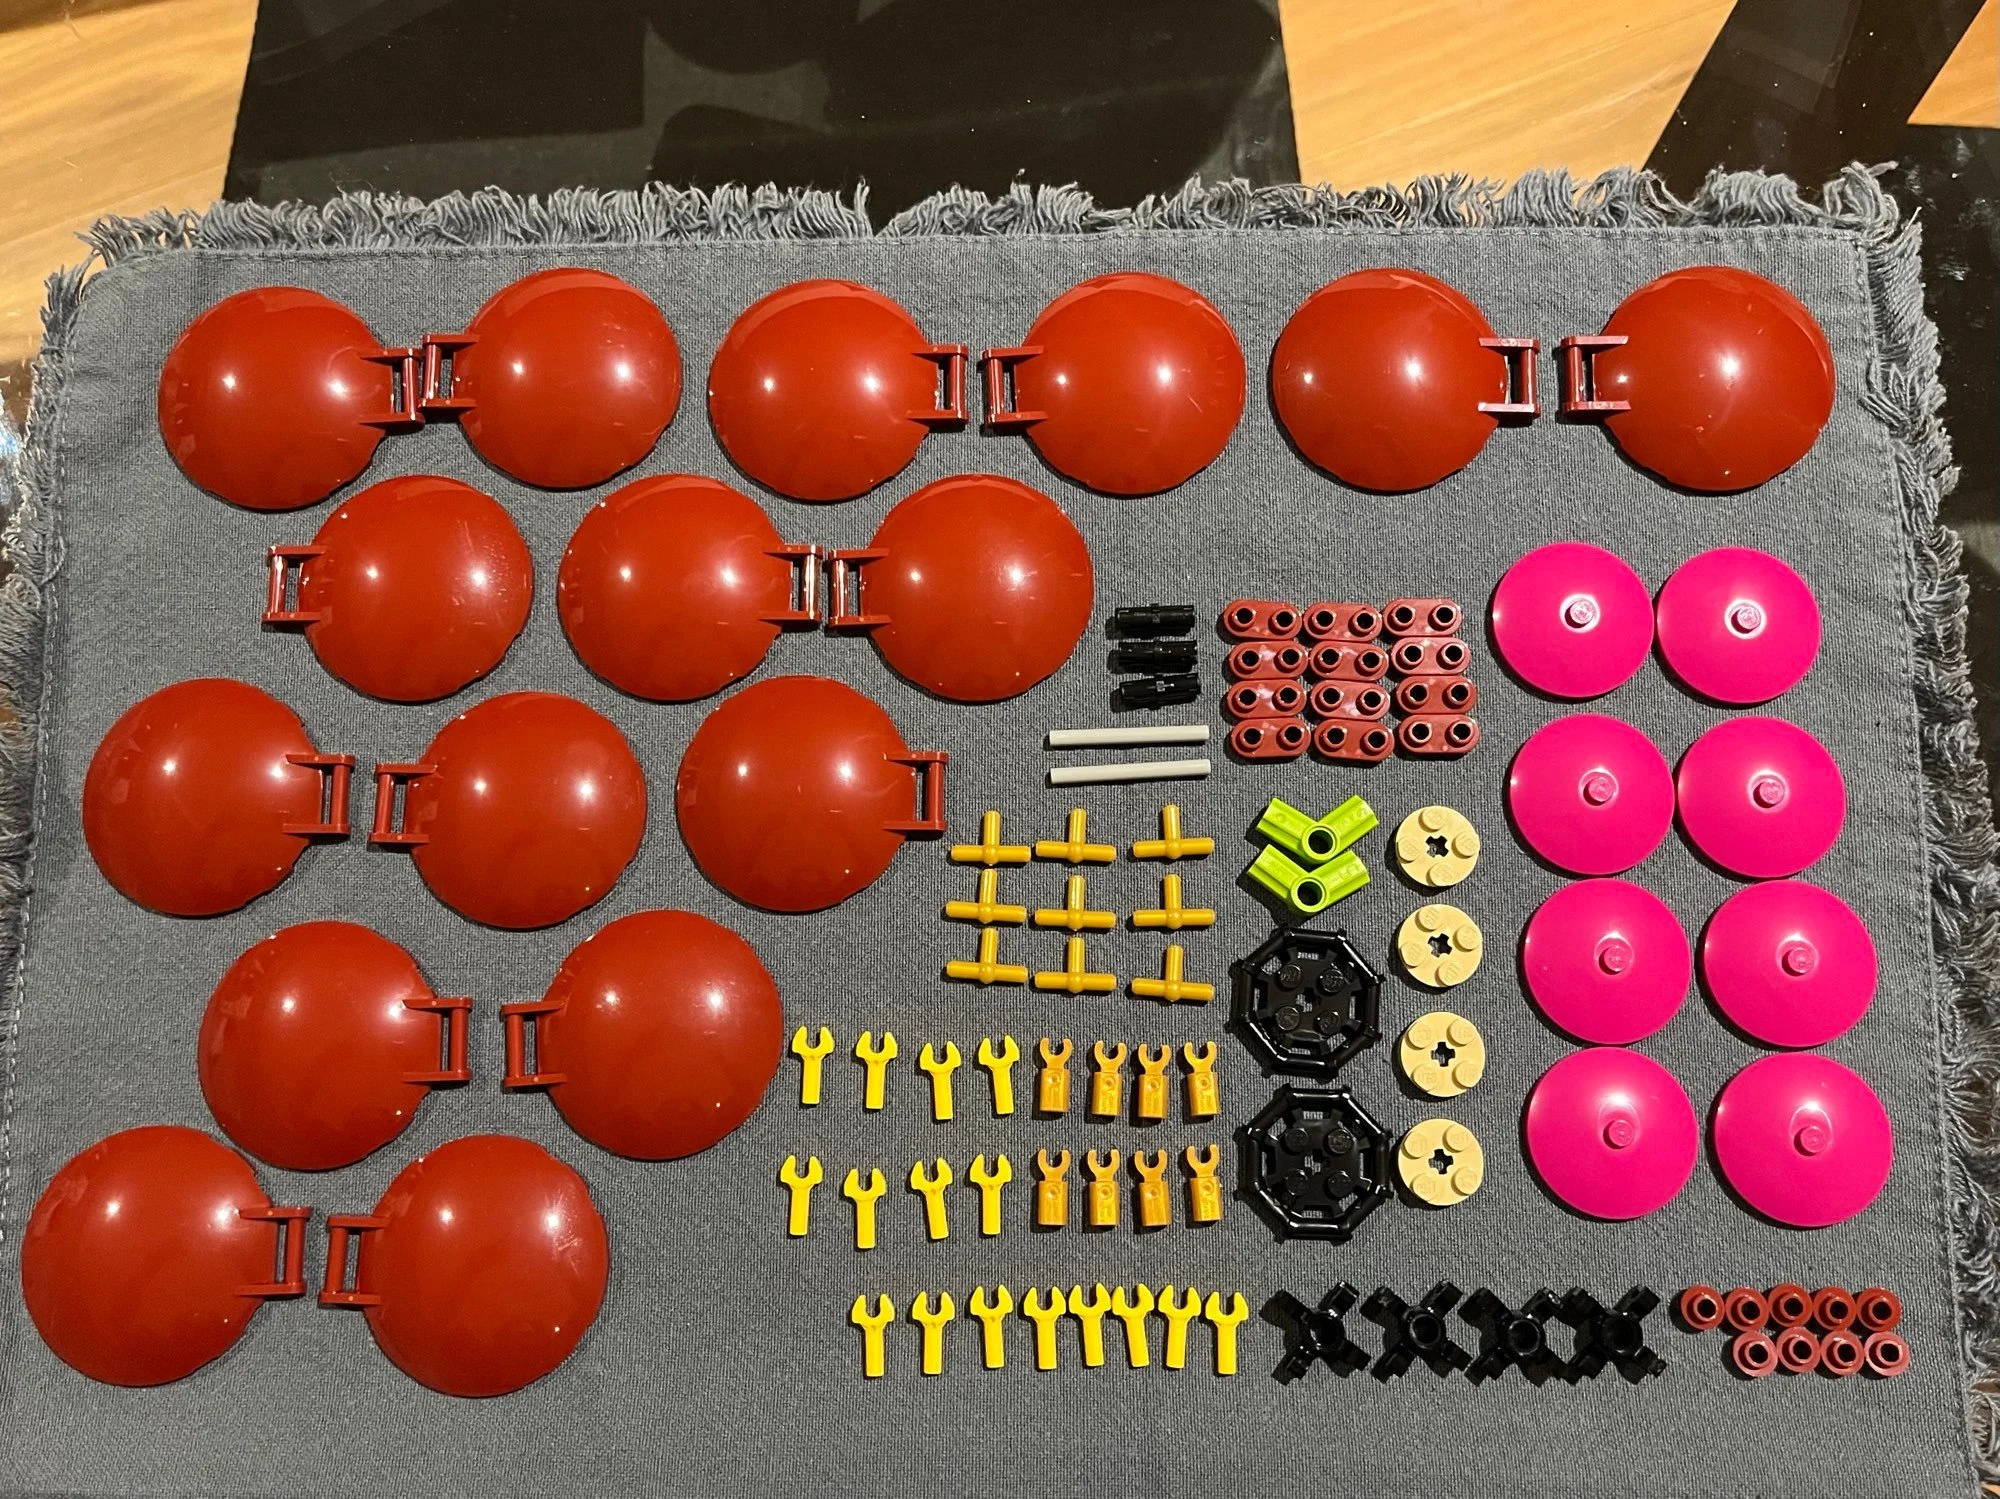
More knolling.
LEGO creation, knolled by Wren Brier
More building, etc.
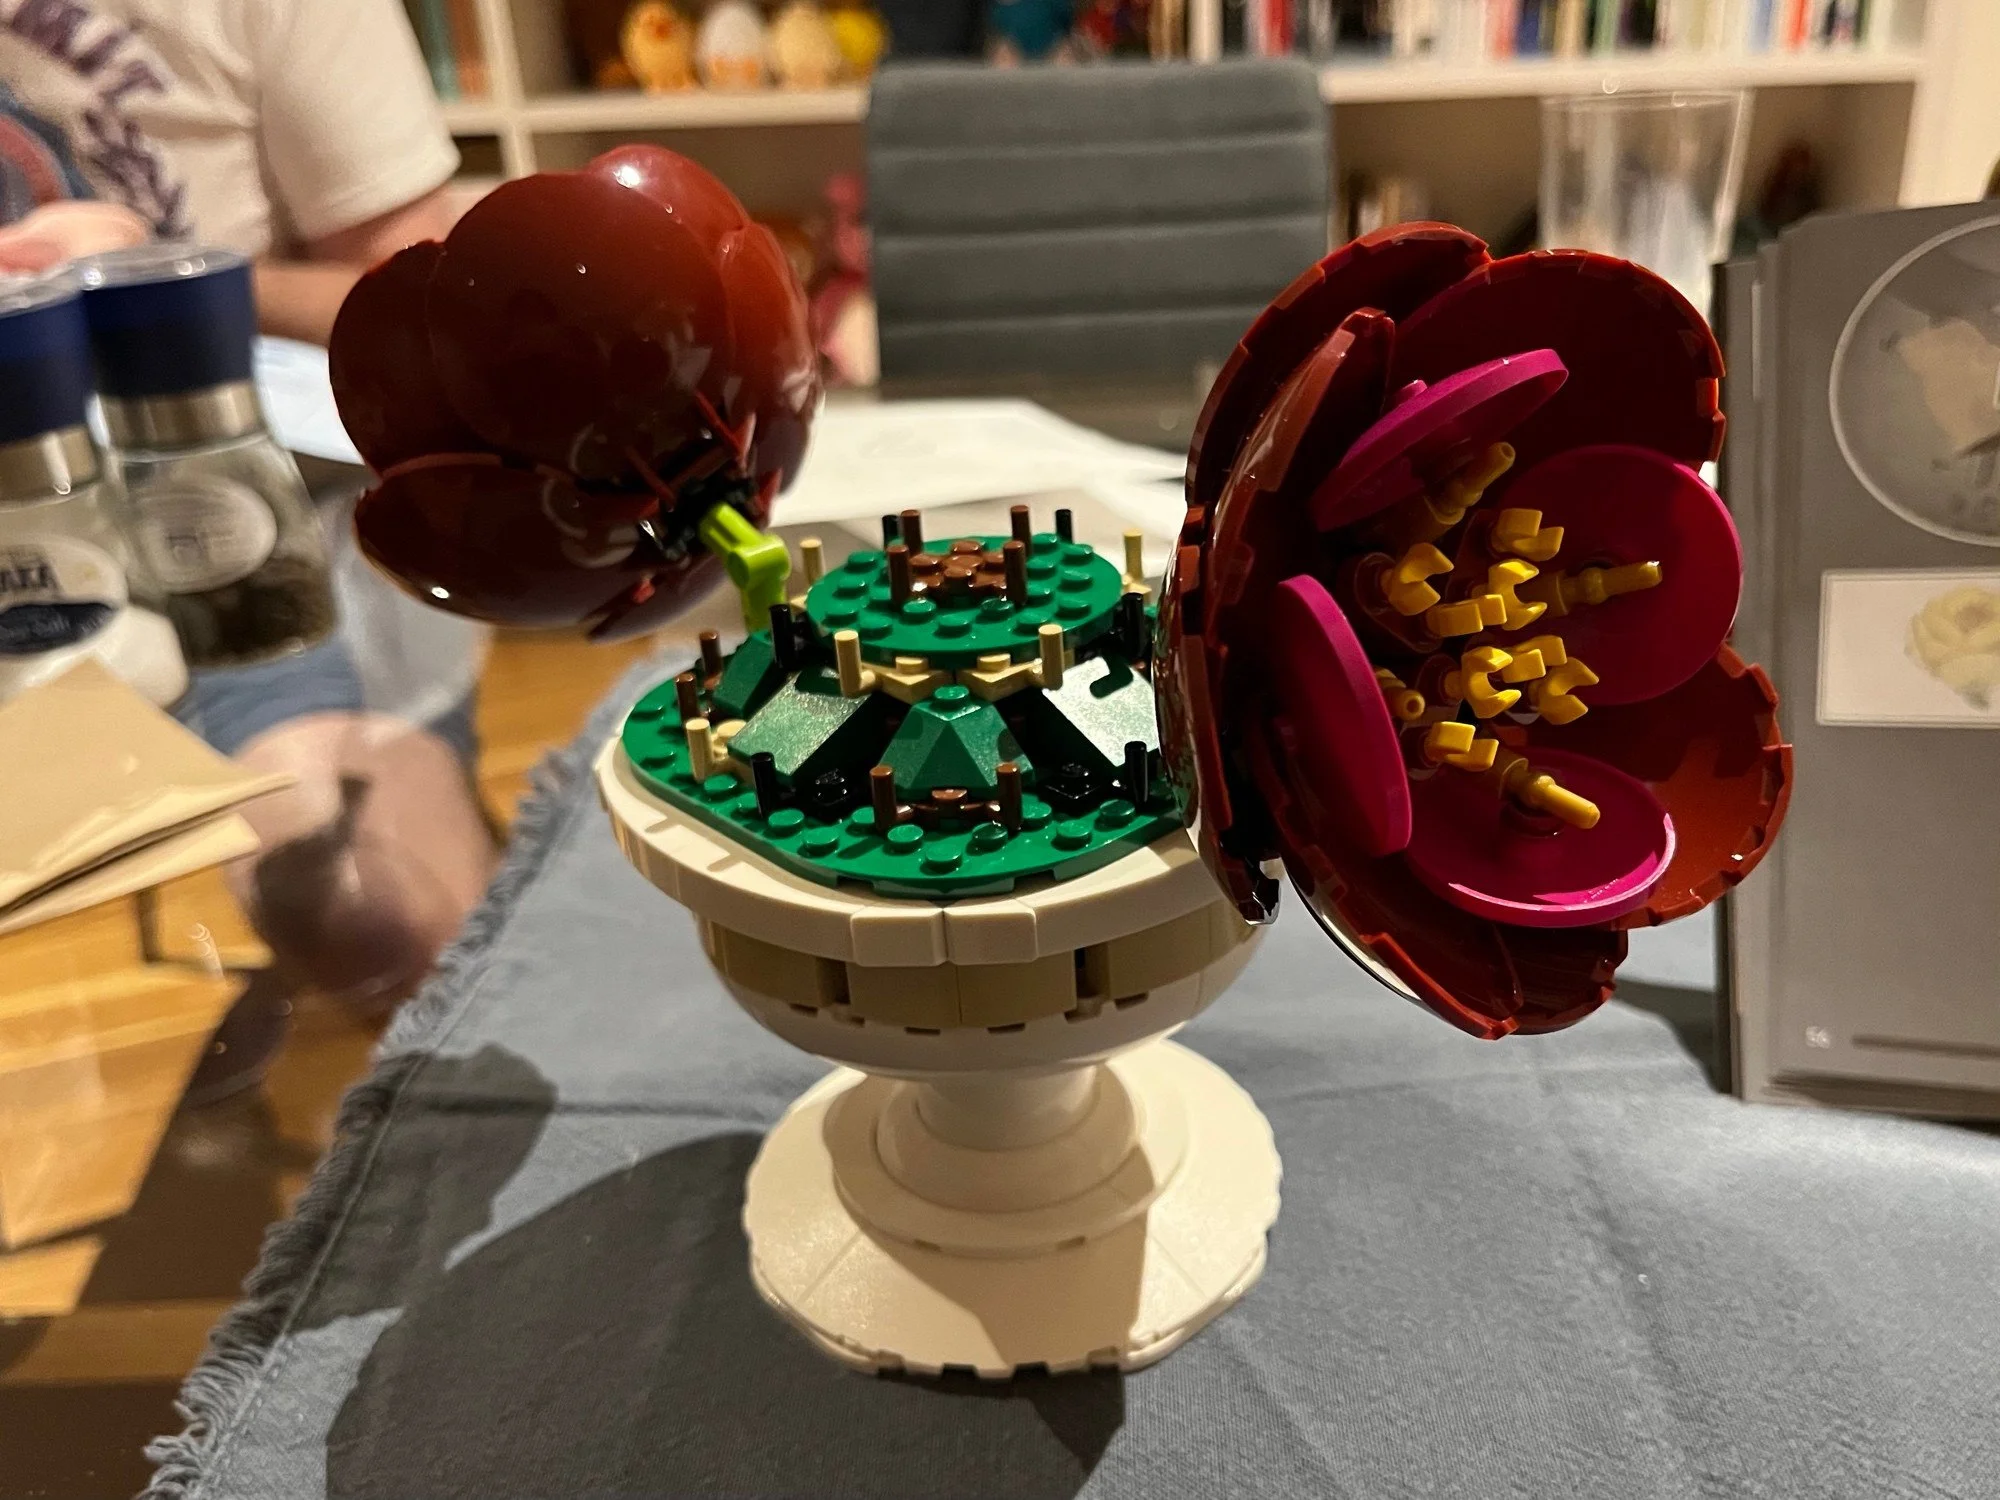
And you keep this process going.
LEGO creation, knolled by Wren Brier
Until you have a nice set of LEGO flowers.
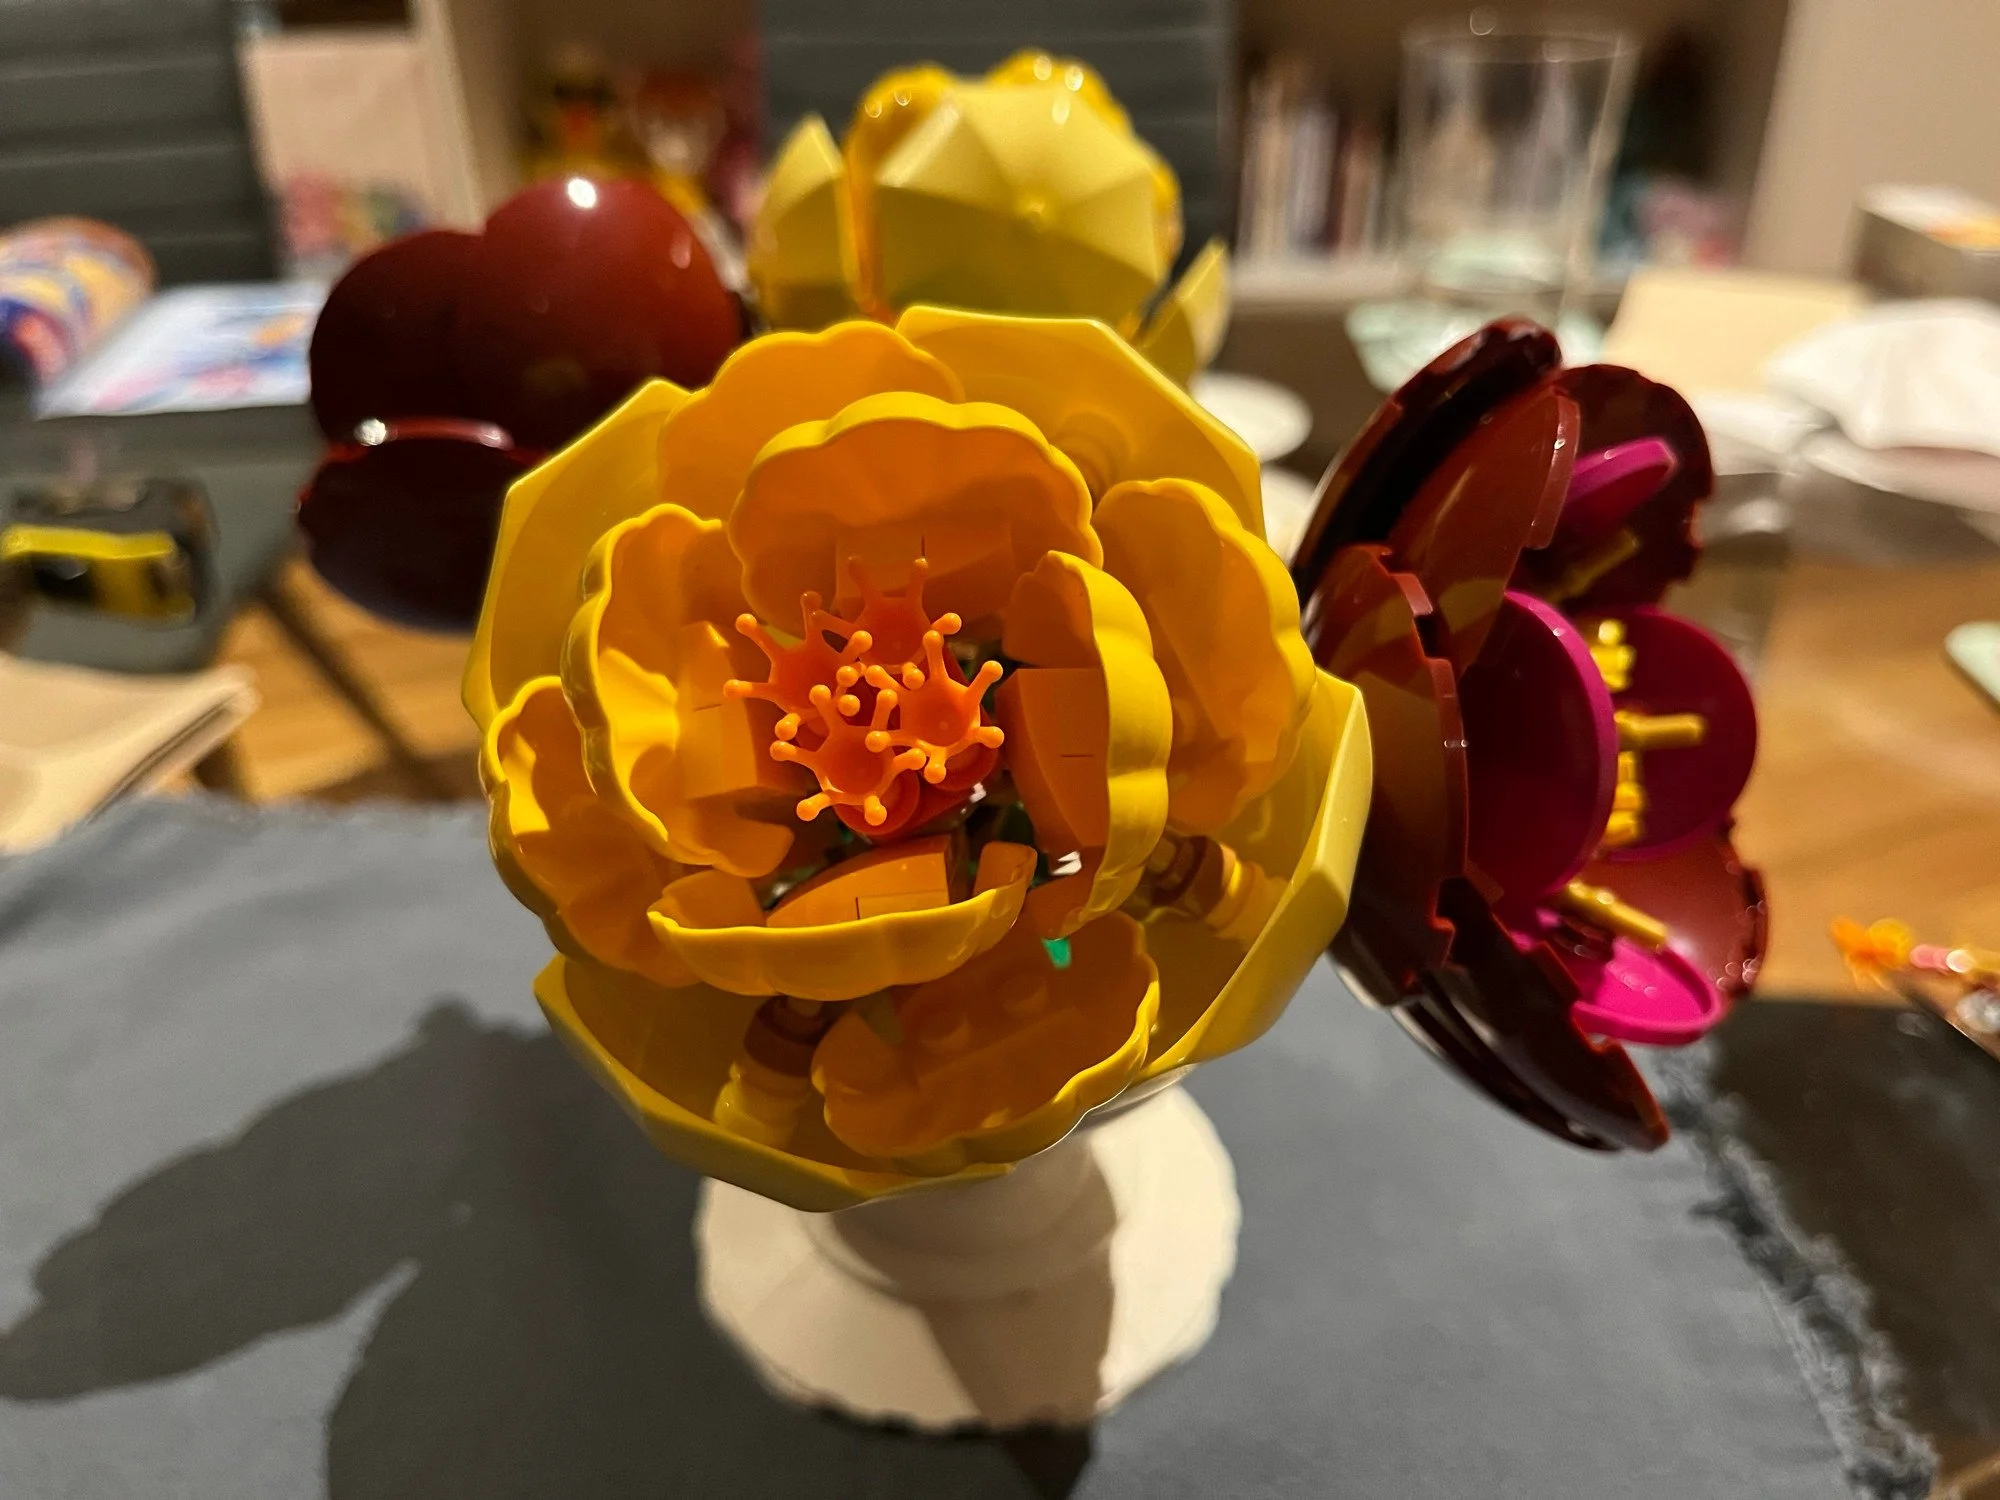
LEGO creation, knolled by Wren Brier
In fact, there is even a popular video game character who has been shown to do this. Hitman, Agent 47, in the Legacy Trailer by Io-Interactive. Look at all this neatly laid out gear!
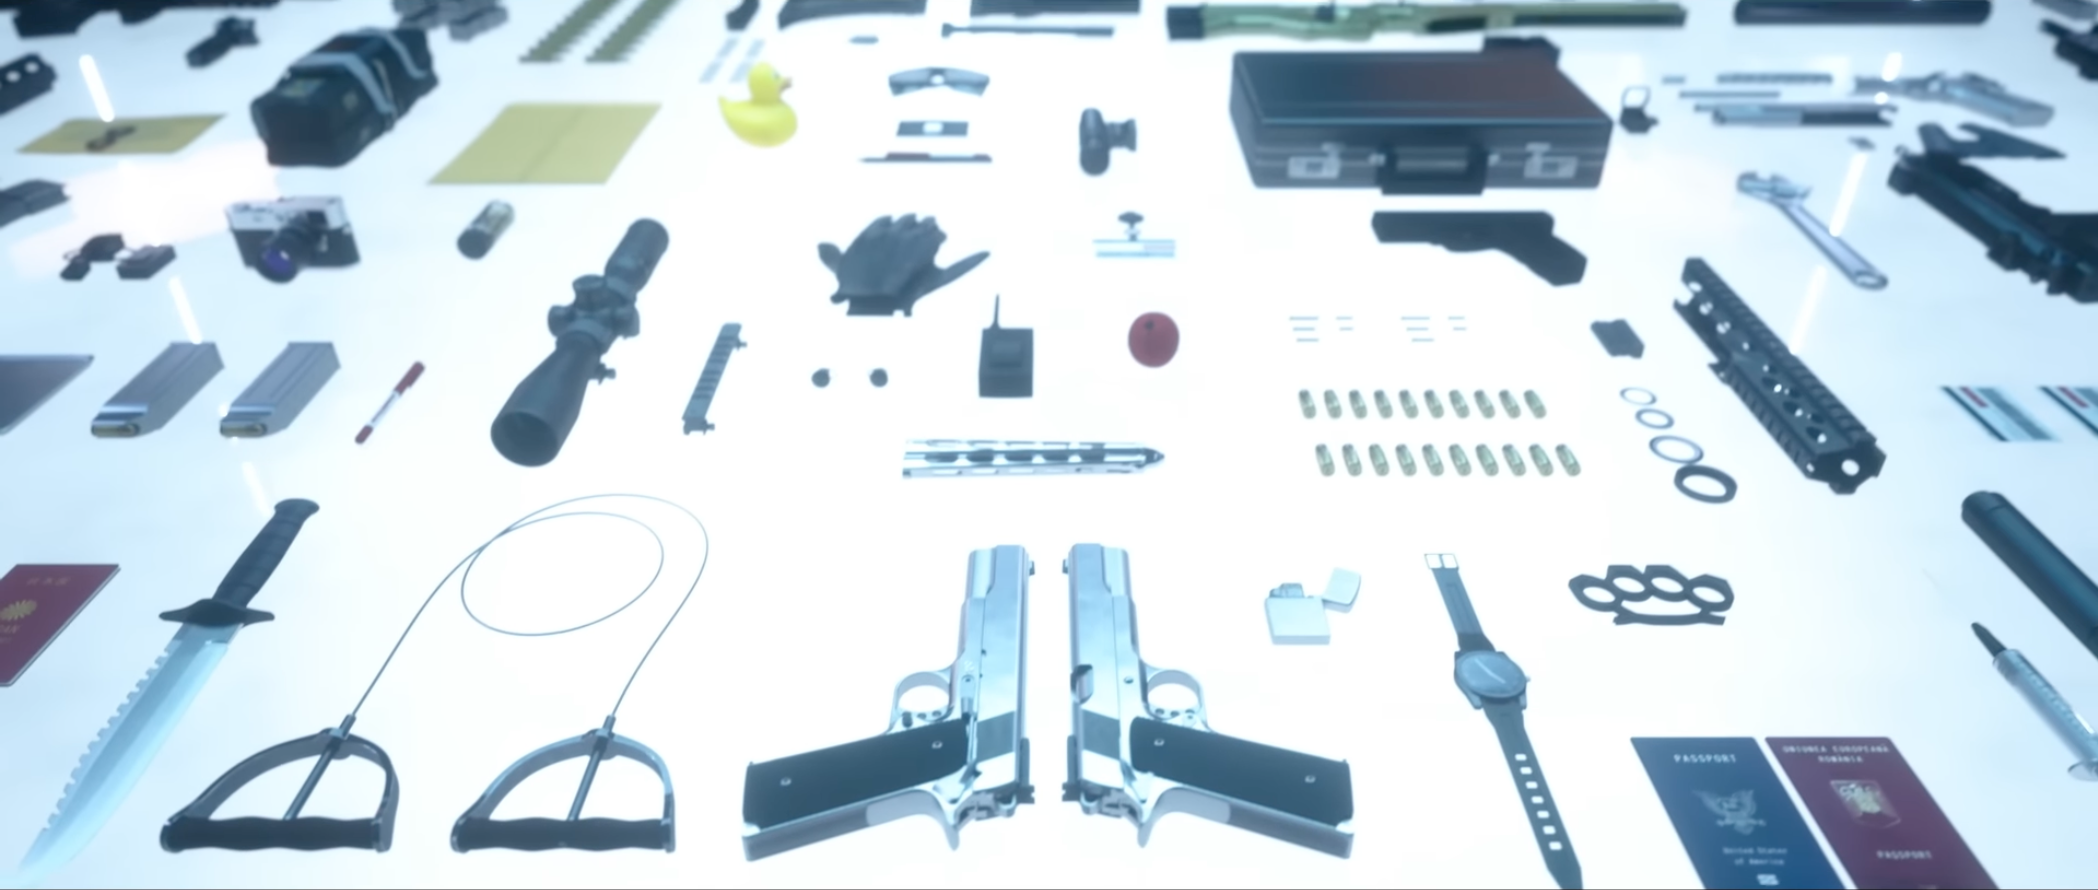
Agent 47’s gear all laid out in neat angles, like knelling
But, you may be wondering: “Why is it called a Zoo?”. And not ‘Farm’, or some other word? To be honest, I do not think I was alive yet when that decision was made. It was long ago. But in the Half-Life 2: 20th Anniversary Documentary, Jeff Lane mentions it. And in the Half-Life 2 commentary nodes they are also mentioned, by Erik Kirchmer.
So Zoos started out as vignettes, and eventually transitioned into layouts of assets in the days of Counter-Strike: Global Offensive. I emailed both Jeff Lane and Erik Kirchmer, to ask about the origin of ‘Zoo’, but sadly received no response. If you know the origin of ‘Zoo’, or have examples from the 90s or earlier, please send me a message! Any kind of asset zoo is fine, by the way, because you can build a Zoo for any asset.
Including animations!
Here is one for an Unreal character. We can see all animations right away. Which also means we can easily debug them all right away. There is no need to know what the animation is called, until we click on it and then see its name. You can also set up a Zoo for hero assets only, or all the store NPCs in your game, or all enemies, or organise them for specific levels. The moment you are able to generate them, all of this starts to become very easy.
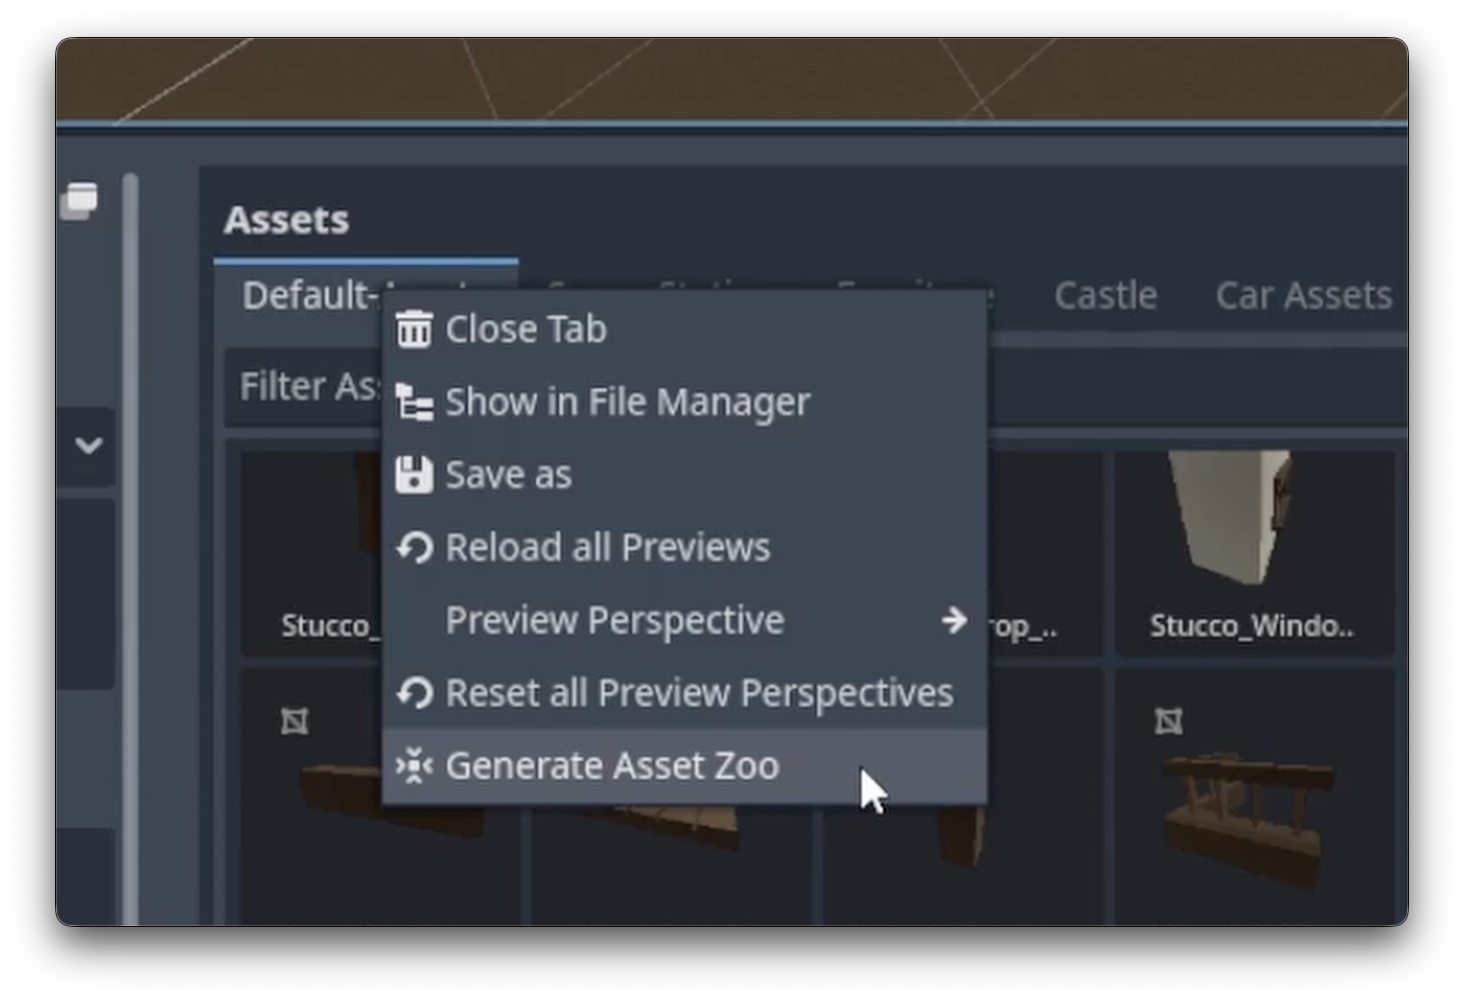
Because yes, you can generate Zoos. They do not require manual work to set up. For example, here is AssetPlacer for Godot, made by Cookie Badger.
Again, we have that classical problem of a whole bunch of assets in an asset browser, with only thumbnails visible. We have no idea what the scale of any of these assets is, or what they look like in lighting. So instead we right click on the group, and click ‘Generate Zoo’. Instantly, we can see what all the assets look like. We can see their scale in relation to each other, with no need to know any of their names, and no assets getting lost. You can do this for any group of assets. Just boom, there is a Zoo!
This is not just Tool Design, this is Workflow Design. This is what I do for a living, and I love it: Creating better workflows for everyone on the project.
Because you can combine multiple tools to create even more powerful workflows. For example, debugging workflows! Here is an asset Zoo in Unreal. Can you point at which asset has an issue?
An asset Zoo, with one easily identifiably pink asset
That is easy, right? It is that one right there. We can zoom in on it. There is something wrong with its shader. Cool, we can fix it.
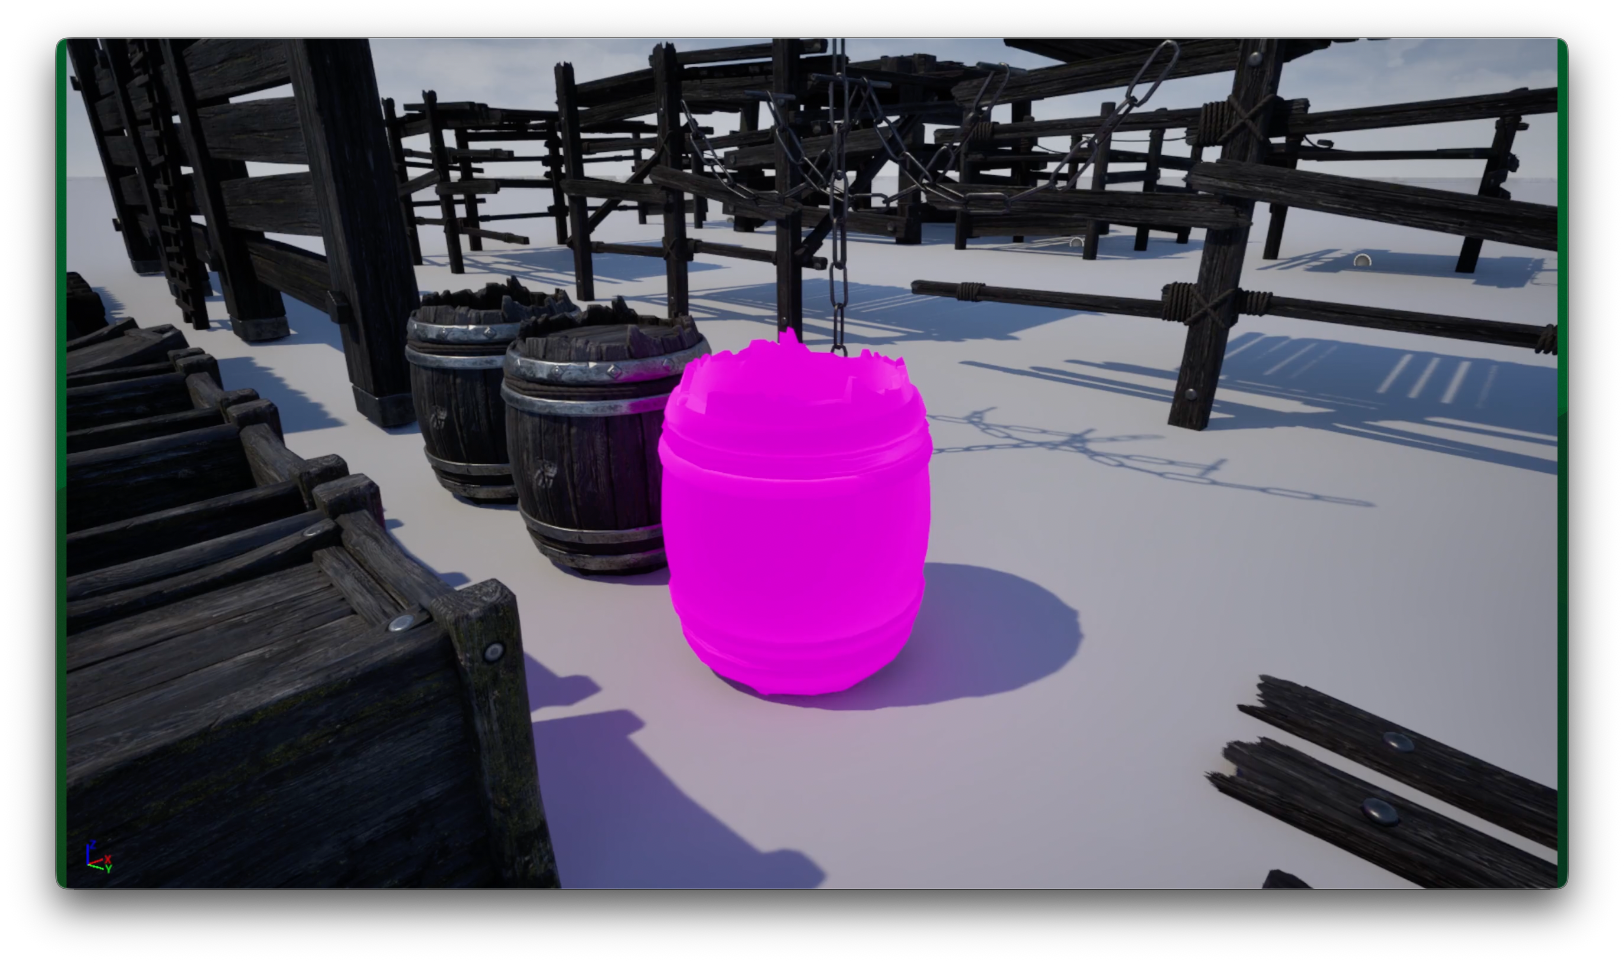
The same pink asset, but zoomed in close
Here is another one. Which asset is not loading correctly?
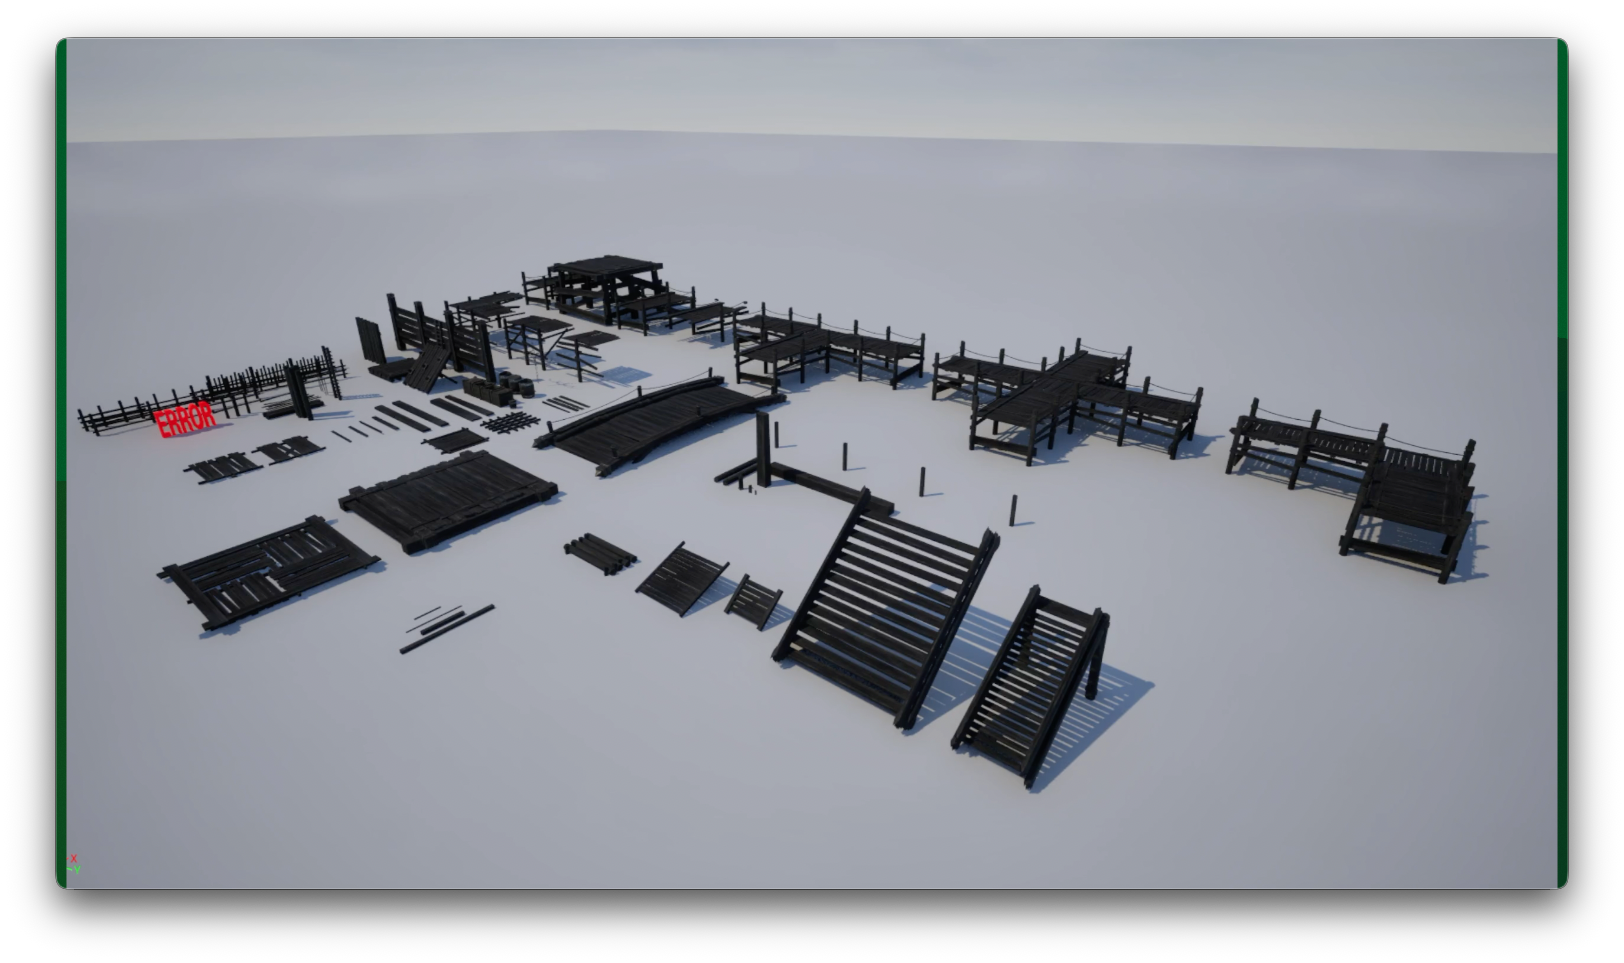
An asset zoo with a big red ‘ERROR’ in it
Instantaneously, we know. We can zoom in on it and find it and resolve it.

The ‘ERROR” zoomed in.
Again, this is also good for smoke testing and other automated testing. For example, for Zoos, I recommend making a screenshot overnight and comparing those to see changes or errors. Here's a screenshot from the zoo yesterday. Here's the screenshot from the zoo today. Lets compare the percentage of changed pixels. Have a lot of pixels changed? Is that because we received a lot of new assets, or has something broken?
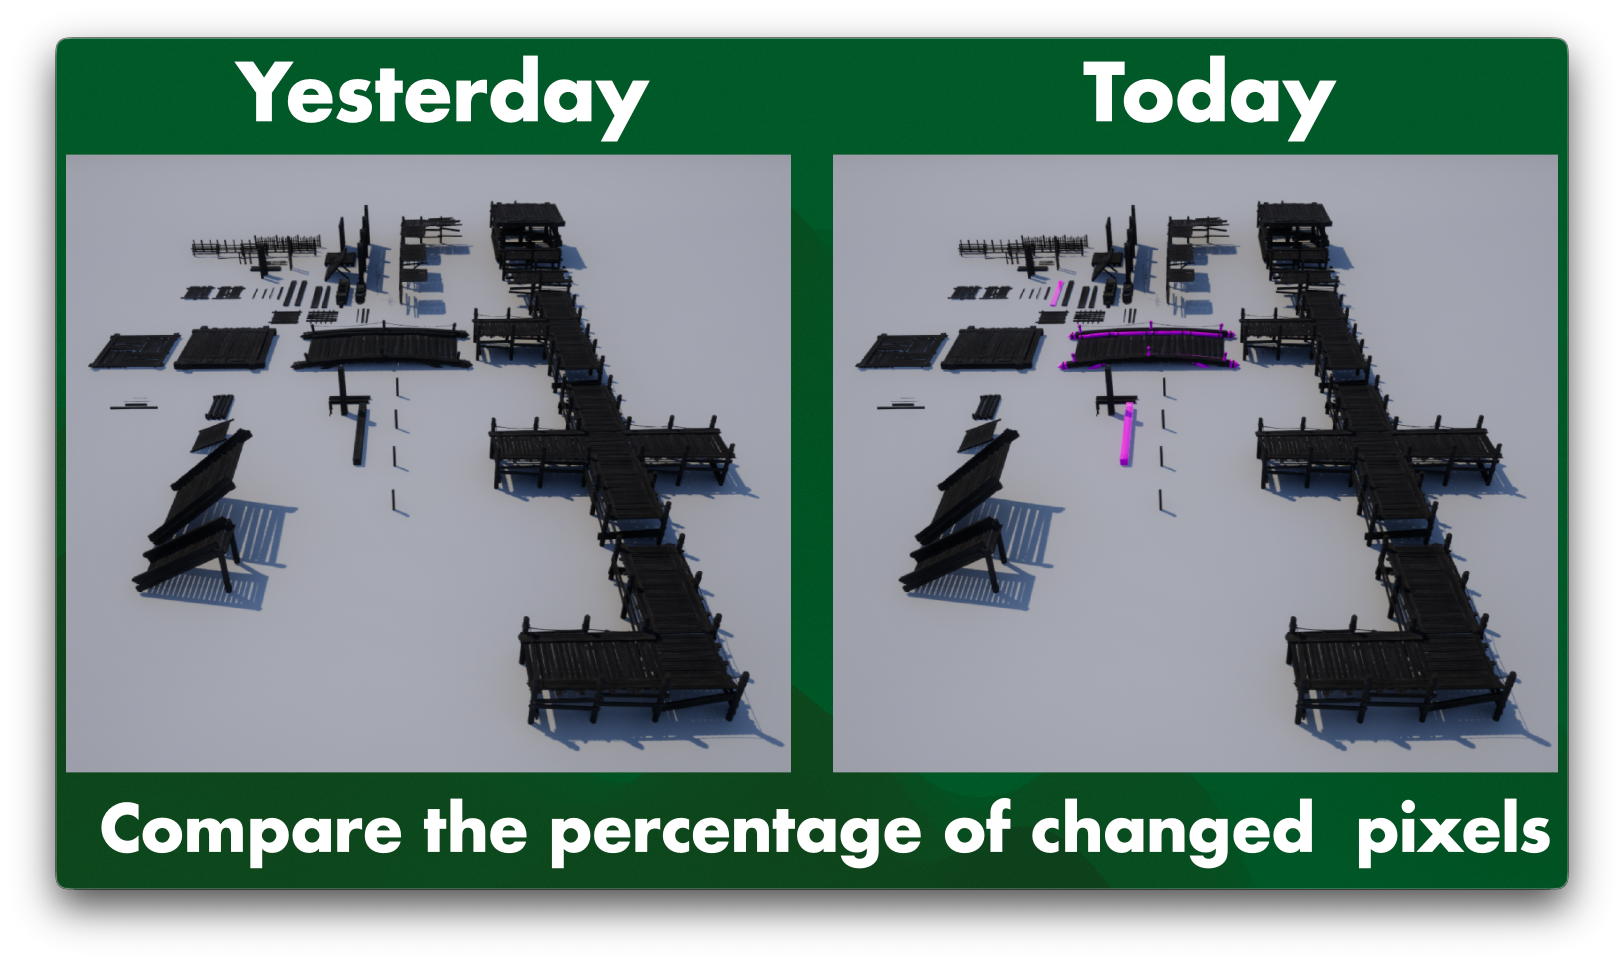
Two zoo images being compared. The right one shows way more purple shader issues
If a lot of change is detected the system can automatically send both screenshots to your art director on Slack, or email. If anything is broken, they can then fix it or tell someone else about the problem so they can fix it.
Here is one more example. Can you find out which asset has a problem here?
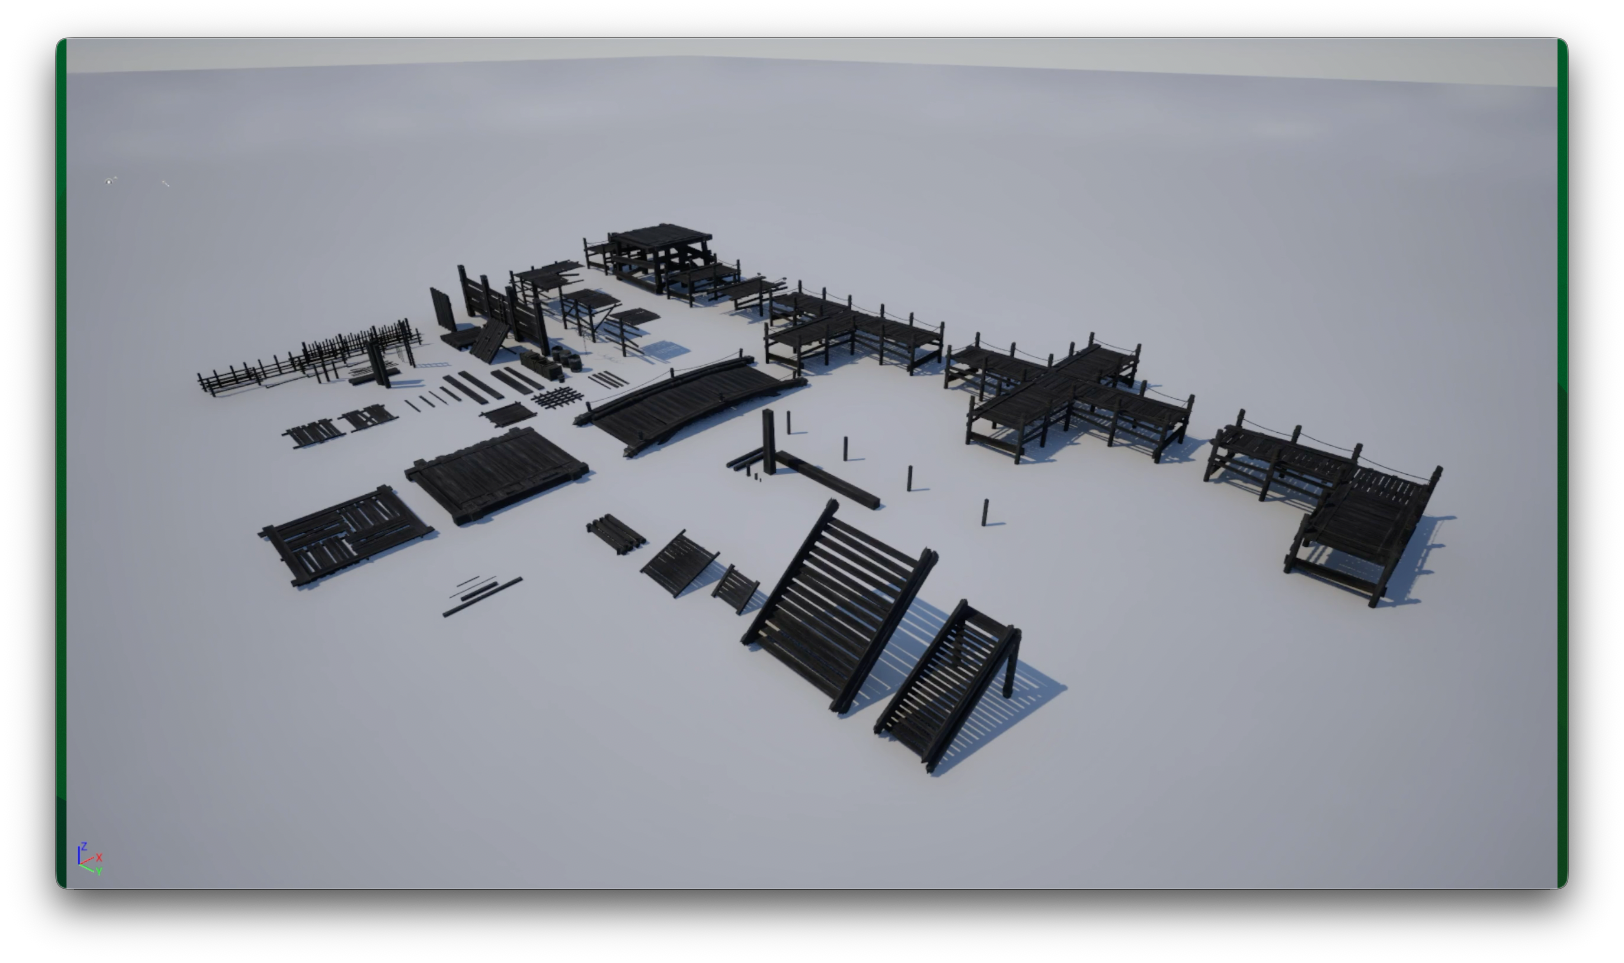
A totally normal looking asset Zoo
Sorry, that was a trick question. You cannot see it. But, if I turn on the shader complexity tool, now which asset has a problem?

The shader complexity tool is on and we see one asset in bright pink
Again, instantaneously we can see, this particular asset over here has a really high shader complexity. Now we can fix it.
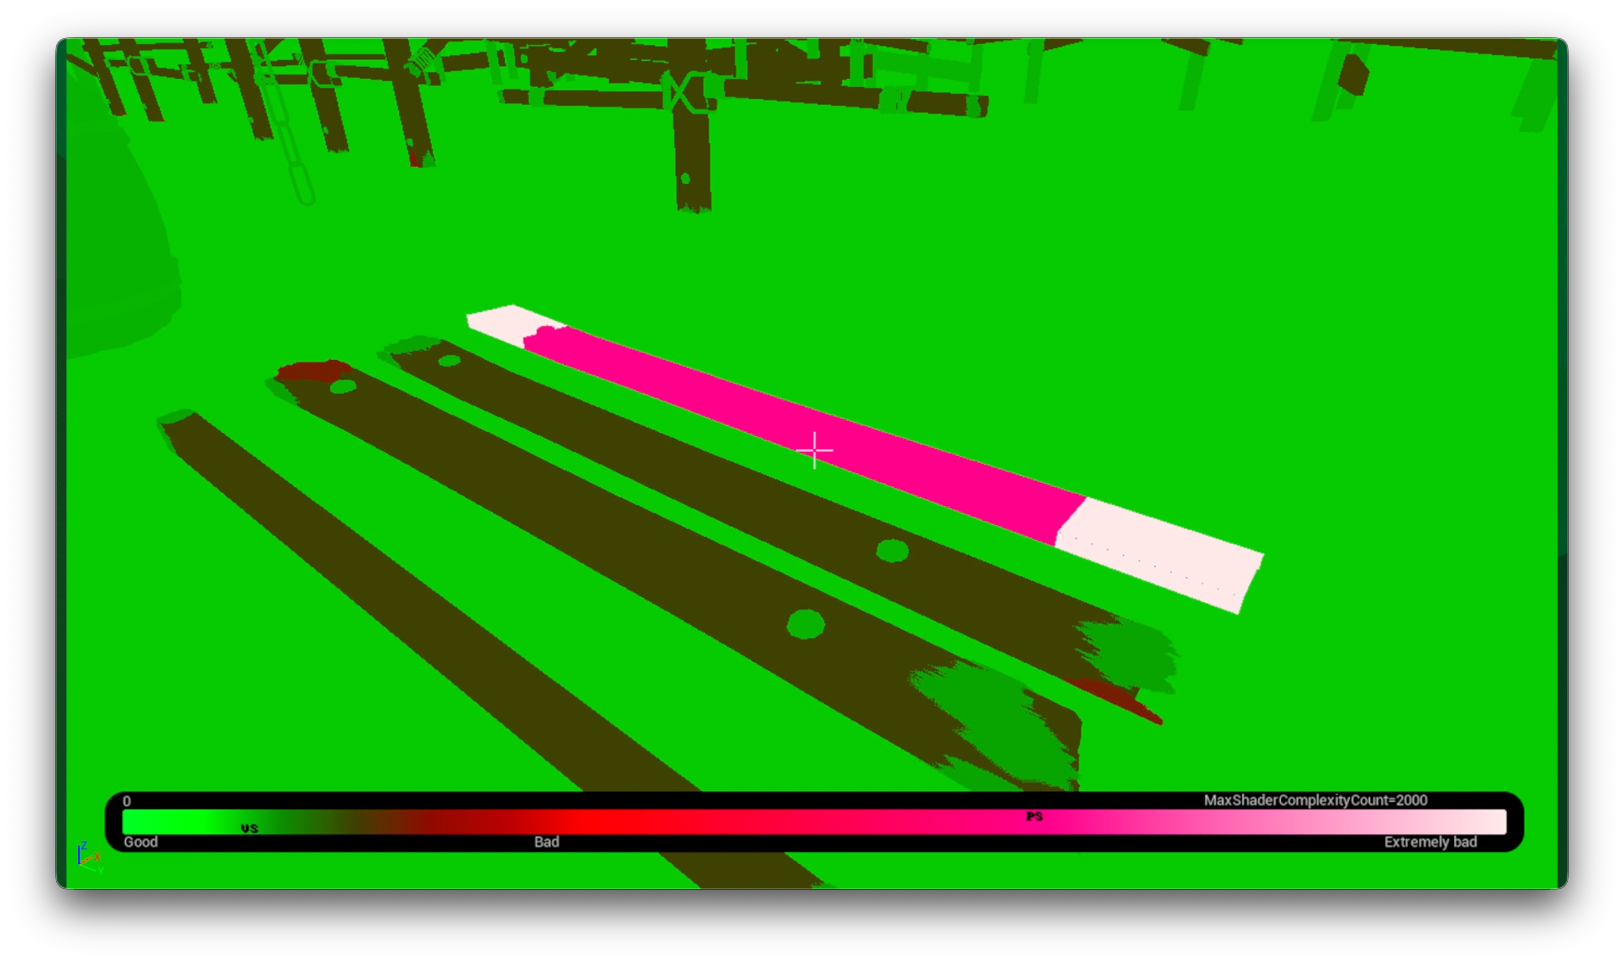
The same asset, up close.
A Zoo makes it so much easier to work with 3D assets.
So, what makes a good Zoo?
Displaying assets on a per-folder, per-use, and per-level basis
Having various lighting settings for each level and time of day
Using scale references with textures or characters
And vignettes, so art director can show everyone how to use the assets.
So that was chapter 2, and the takeaway is: Use Zoos!
Chapter 3: Museum
This is for technology & systems, for shaders & rendering, and for physics & prefabs.
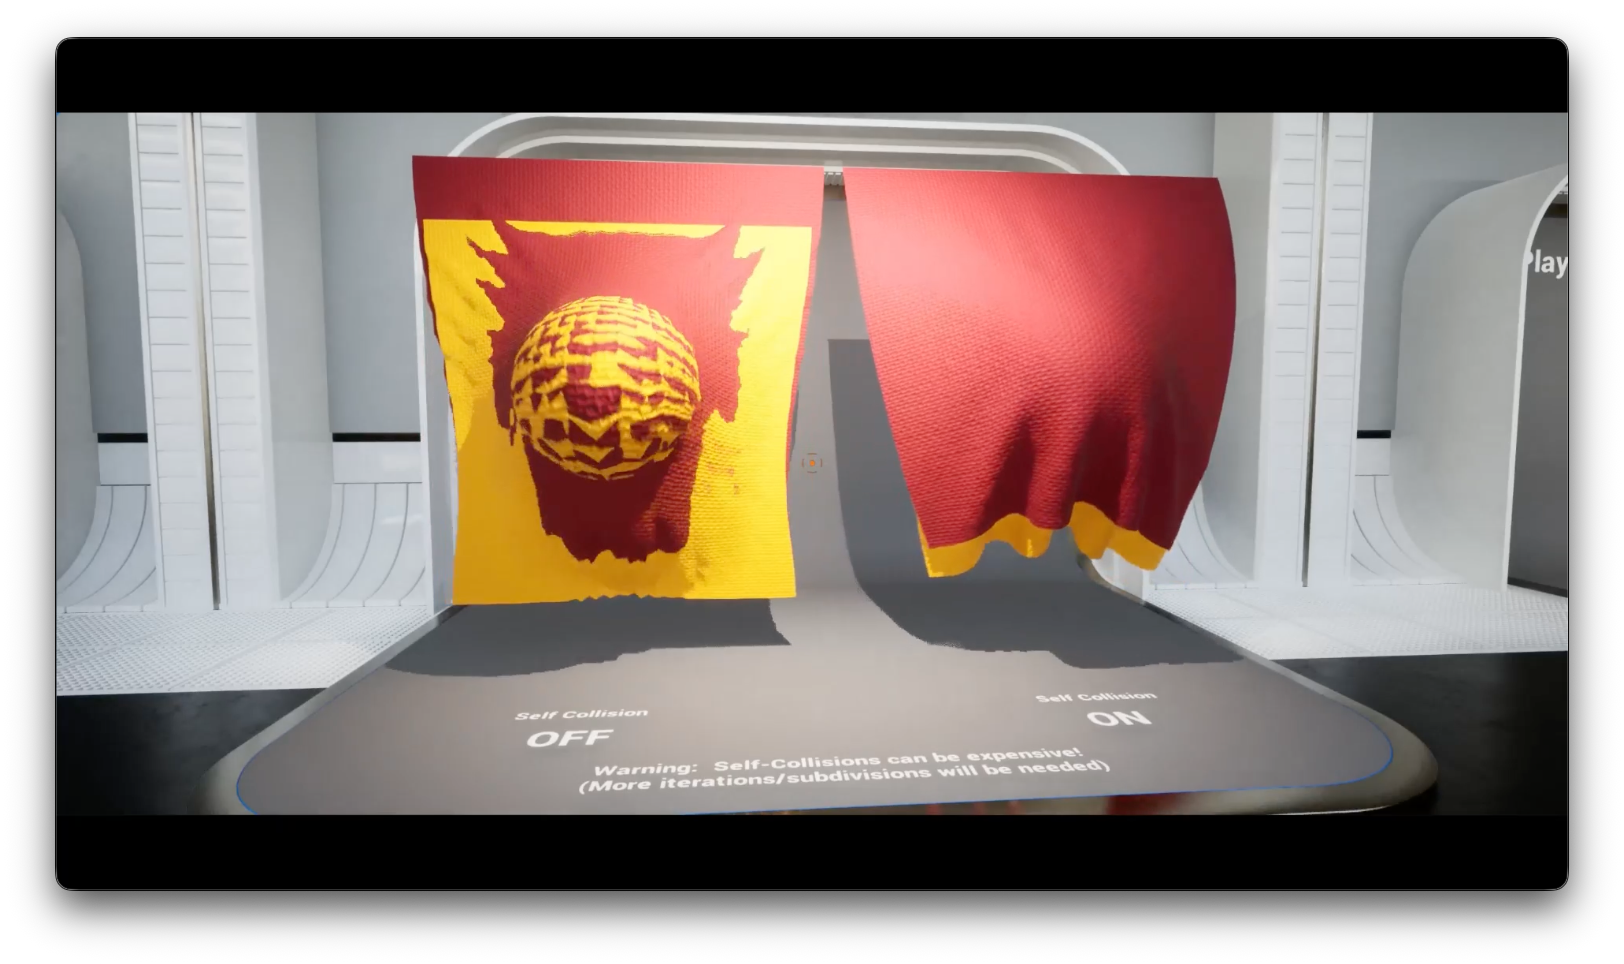
Here is a little museum example from Unreal Engine. Again, you can download this for free as part of Unreal.
This is a museum for their cloth system. It is a little level in which you can see examples of how their cloth system works. You can start playing it and instantly see examples. And if something breaks, we can instantly see it too. You can also place markers inside museums for more info, such as this little green question mark here. We can click on that and find a link to the API documentation, or maybe make it into an audio commentary node.
This museum means we are not starting off with reading 40 to 50 pages on some confluence wiki, and instead we get instant visibility on how the system works, with the ability to also read up about it if you want to.
Unreal also has a physics system, called Chaos Destruction. Look at how big their museum is for that.
It is a lot of examples, and again, instead of 50 pages on Confluence, you can just load up this level, and see how it works. Everyone can instantly understand how the system is supposed to work.
Skin Deep also released a Mod Museum to the public. This is for UGC, user generated content. This allows modders to easily understand the systems of the game. This is helpful because especially players never read documentation, and besides, many of the concepts shown here are much clearer in 3D than in text.
In this case the museum is one level. And from there you can load into other levels. So you only have to remember one level to load up! Everything else is easily reachable from here. You can see what other levels will explain to you with some text below the TV, which is an object that teleports you to the right museum map. In this case, I’m going to turn on no clip so I can fly around fast.
Like for example, what's the player width and player height? This many units. So don't go over those. Don't make it smaller than that. What’s the crawling height for a player? There it is right there. We can instantly understand. What's the jump height and also what height countertops should be? It’s in the museum. What is the clamber height? What can't be clambered? What's the crawl height? Instantly we can understand everything, like how high should the entities be on a wall? What’s the size that a window should be? What are the size that stairs need to be? And this is not just for what you need to do, also for what you not need to do.
For example, there is a section on no overhangs, like, hey, you shouldn't be building overhangs, and here's an explanation why don't do this. It’s confusing for the player. Our systems don't work well for this or whatever it may be. So, don't do this.
Again, you can explain all these things to your developers internally and also to external people, things such as: No clamber above clamber. Don't do it. Something is going to mess up with our system if you do!
And also for lighting systems, like how does the lighting system work? Watch out for this.
Please do that. Please don't do that. Please, make sure your work behaves in certain ways.
And also scripting, like for example, here's a little scripting thing and it literally shows you as it goes through the script and it does the thing that the script is doing right there.
So a little cat that's going to come up. It's going to wait a little bit and it's going to talk a little bit and do an animation. Then it's going to do another animation that we are actually going to wait for because it's important. Now we understand how the system works, with a live example anyone can run through on their own. Not big documentation, it shows how it works.
So, what makes a good Museum?
It functionally displays how the systems work.
Has text explaining the systems.
And contains links to further technical documentation.
So that takes us to takeaway number 3: Use Museums!
So with Gyms, Zoos, and Museums, they are not just in-game. They are spatial. And that brings us to the surprise chapter 4!
Spatial Documentation!
Which is useful, for everything.
For example, let's say you’re at the start of building a game. You have a level that's not done yet. It's hard to see what everything looks like. Put some spatial documentation in there.
Those are the farmlands. Dungeon number two is over there. Dungeon number one's over there. We got the human city in this spot. We got the dwarven city there. We got the deep forest over there. I don't need to look in some documentation or find the meeting in which something was discussed. I can just look at the level itself and see “Oh yeah, dungeon number two is over here.”. It might change names. It might change locations, but I can instantly see where everything is. For example in the human city, I can even go deeper inside it. I'm like, “Oh, this is the quest three start location."
So I can understand where I need to debug something. If something should or should not move, I can indicate that in game, with a little note saying, "Hey, please don't move this."
You can also use this for
Bug reports
Design changes
General to do tasks
Whatever you like to document
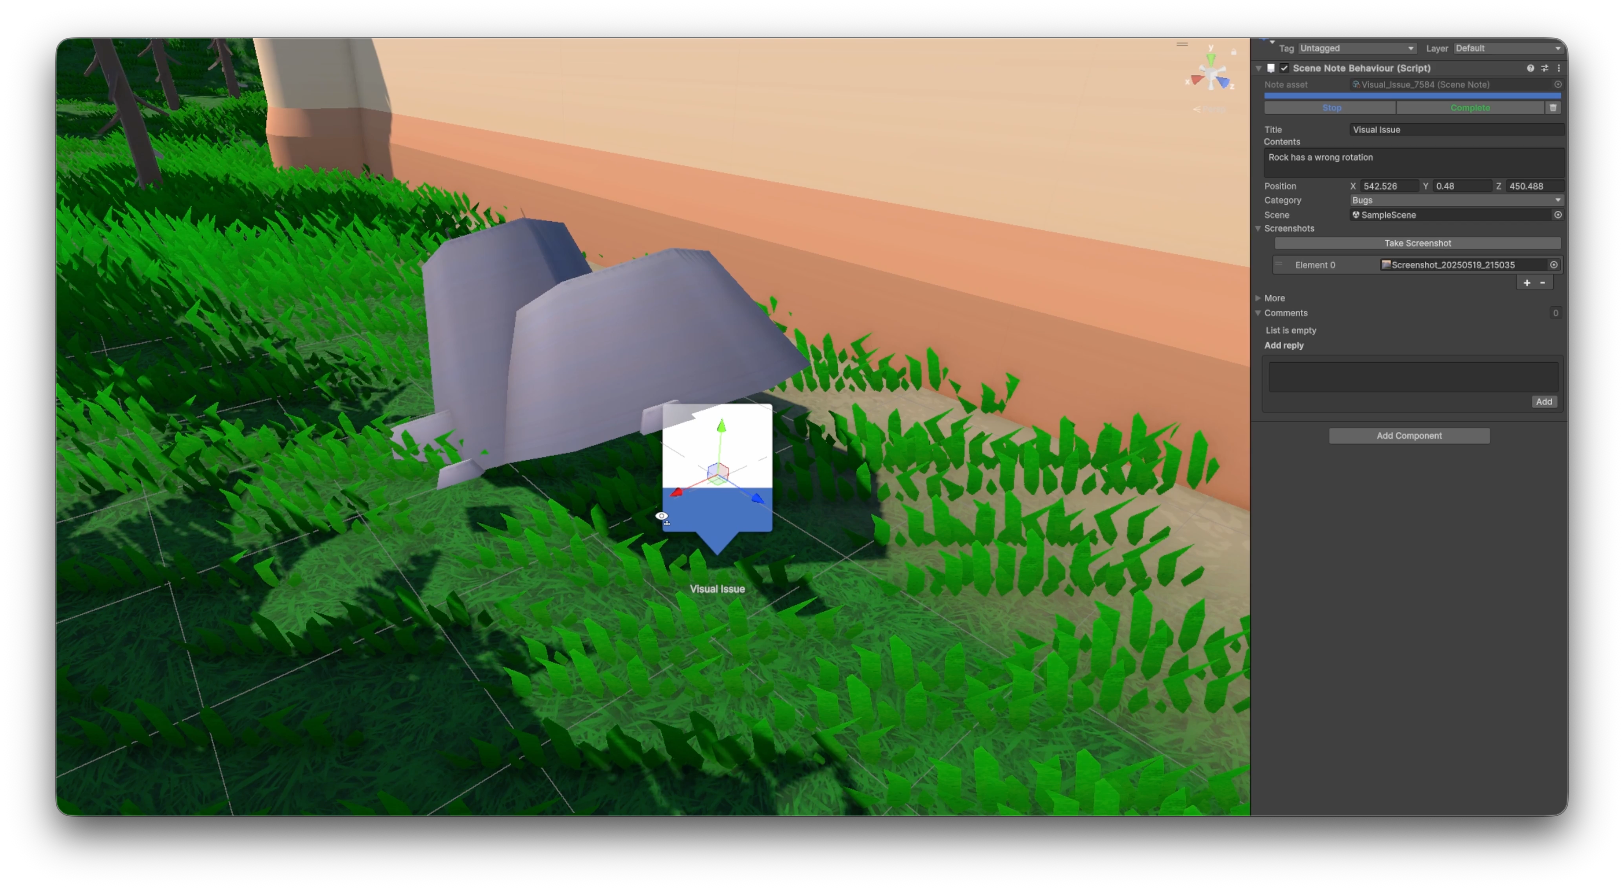
For example, here’s Scene Notes, for Unity, a plugin by Ciro Continisio.
With it, you can place markers inside your levels, inside the editor. And those markers contain data, for example there's some grasses covering the road here, and there's a position of that. The category is to-do. It's in this particular scene. There's no screenshots attached and no comments, but we can do that if we wanted to, and we can instantly see like, yeah, there’s a problem there. So, we can resolve that right here in the editor. We could even complete the ticket right here, and we can document all kinds of issues.
For example, all these these banners. Some art director probably said: “Oh, these are too long.” So they left a little note saying, "Hey, these are too long. You can resolve this, like change this." And so now when someone’s doing the work, they can see that in game, right? And they also know not to document it again, because they know it is documented, right there in game.
Or this this rock over here, it's rotated a little weird. So someone wrote down, "Hey, this this rock has the wrong rotation." There's even a little like screenshot attached. So we can see what that person originally saw when they were playing the game. So we double click on that and boom, we can see a screenshot, and yep, that's obviously wrong. Something's wrong there. So we can fix this now.
In this particular case, scene notes does not support logging while playing a build, and does not link to Jira, but you can imagine how doing those things would speed up the workflow even more! Because the devs sees what they need in the context they need it in.
Games have used spatial commenting systems like this for many years. For example, The Legend of Zelda, Breath of the Wild, used such a system for their open world. Everyone can comment inside the world, and find each other’s notes, so that the world itself becomes the documentation.
It can be helpful to have a world map view as well, in which important data can be easily looked up. Martin Thorzen did a great talk about this at GDC 2015, showing the database viewer he built for The Witcher 3.
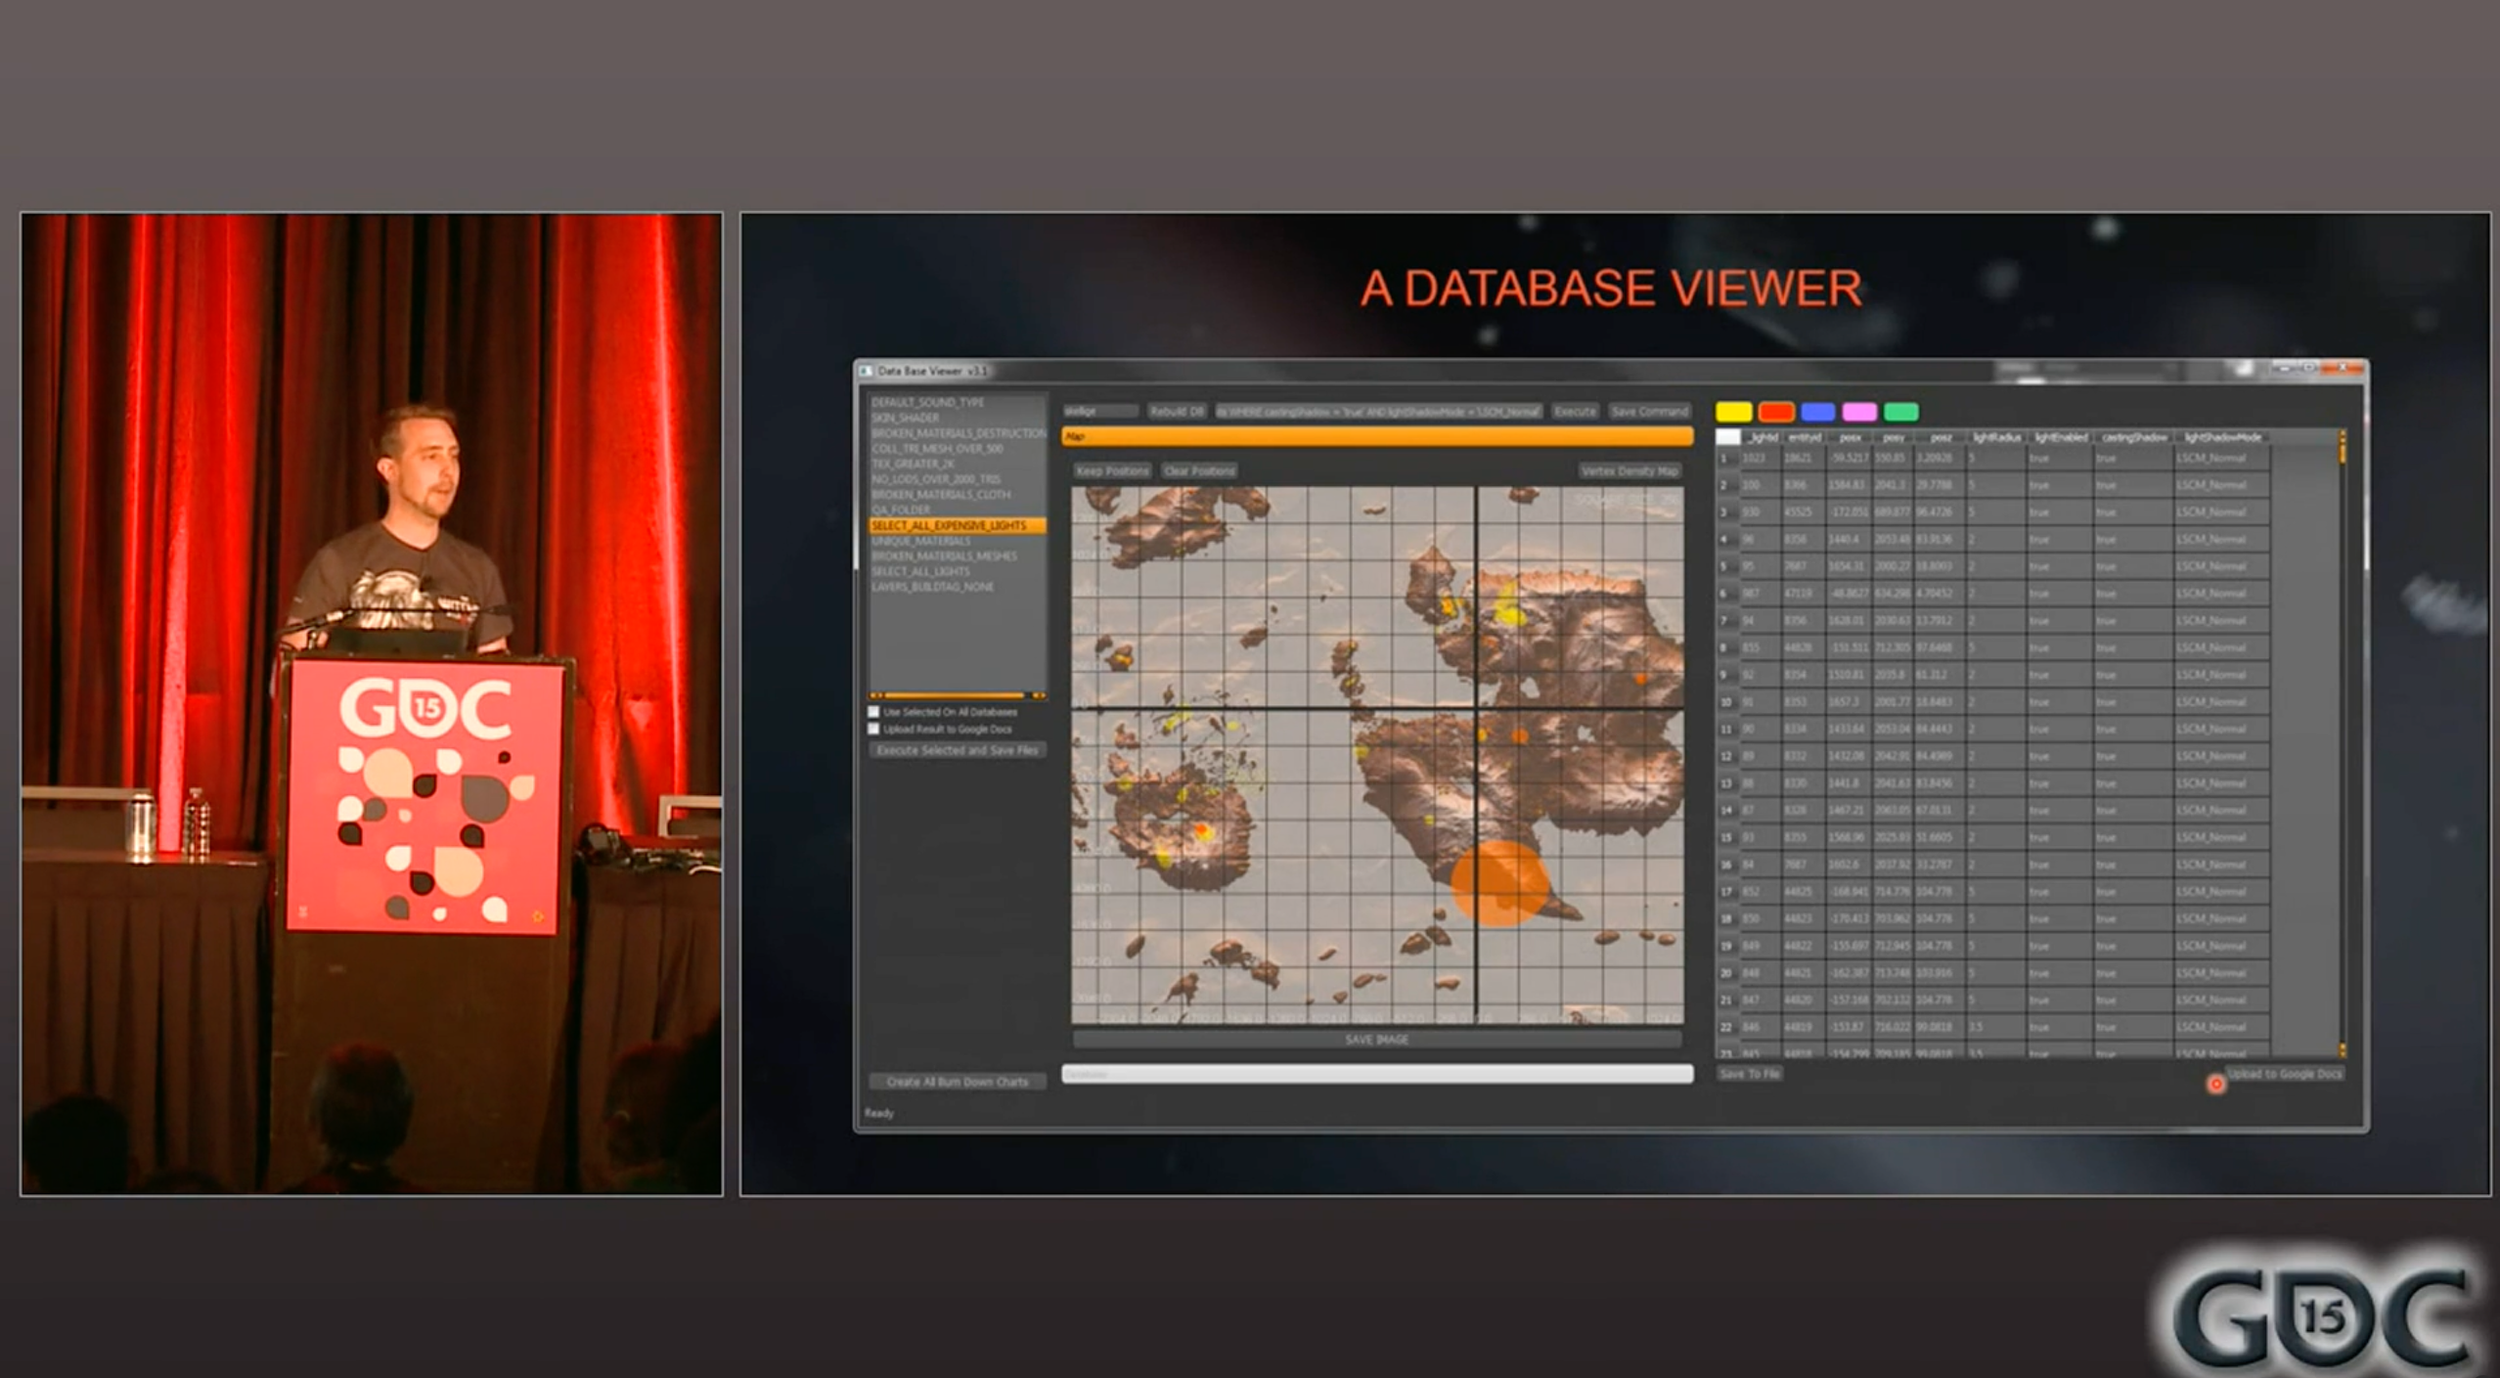
Martin Thorzen at GDC 2015 showing the database viewer
His database viewer can show things like vertex density, in a topdown view of the world. It can also show high foliage counts, and any other thing the user wants to search for. So then you know where the problem is, and can easily navigate to that problem to resolve it.
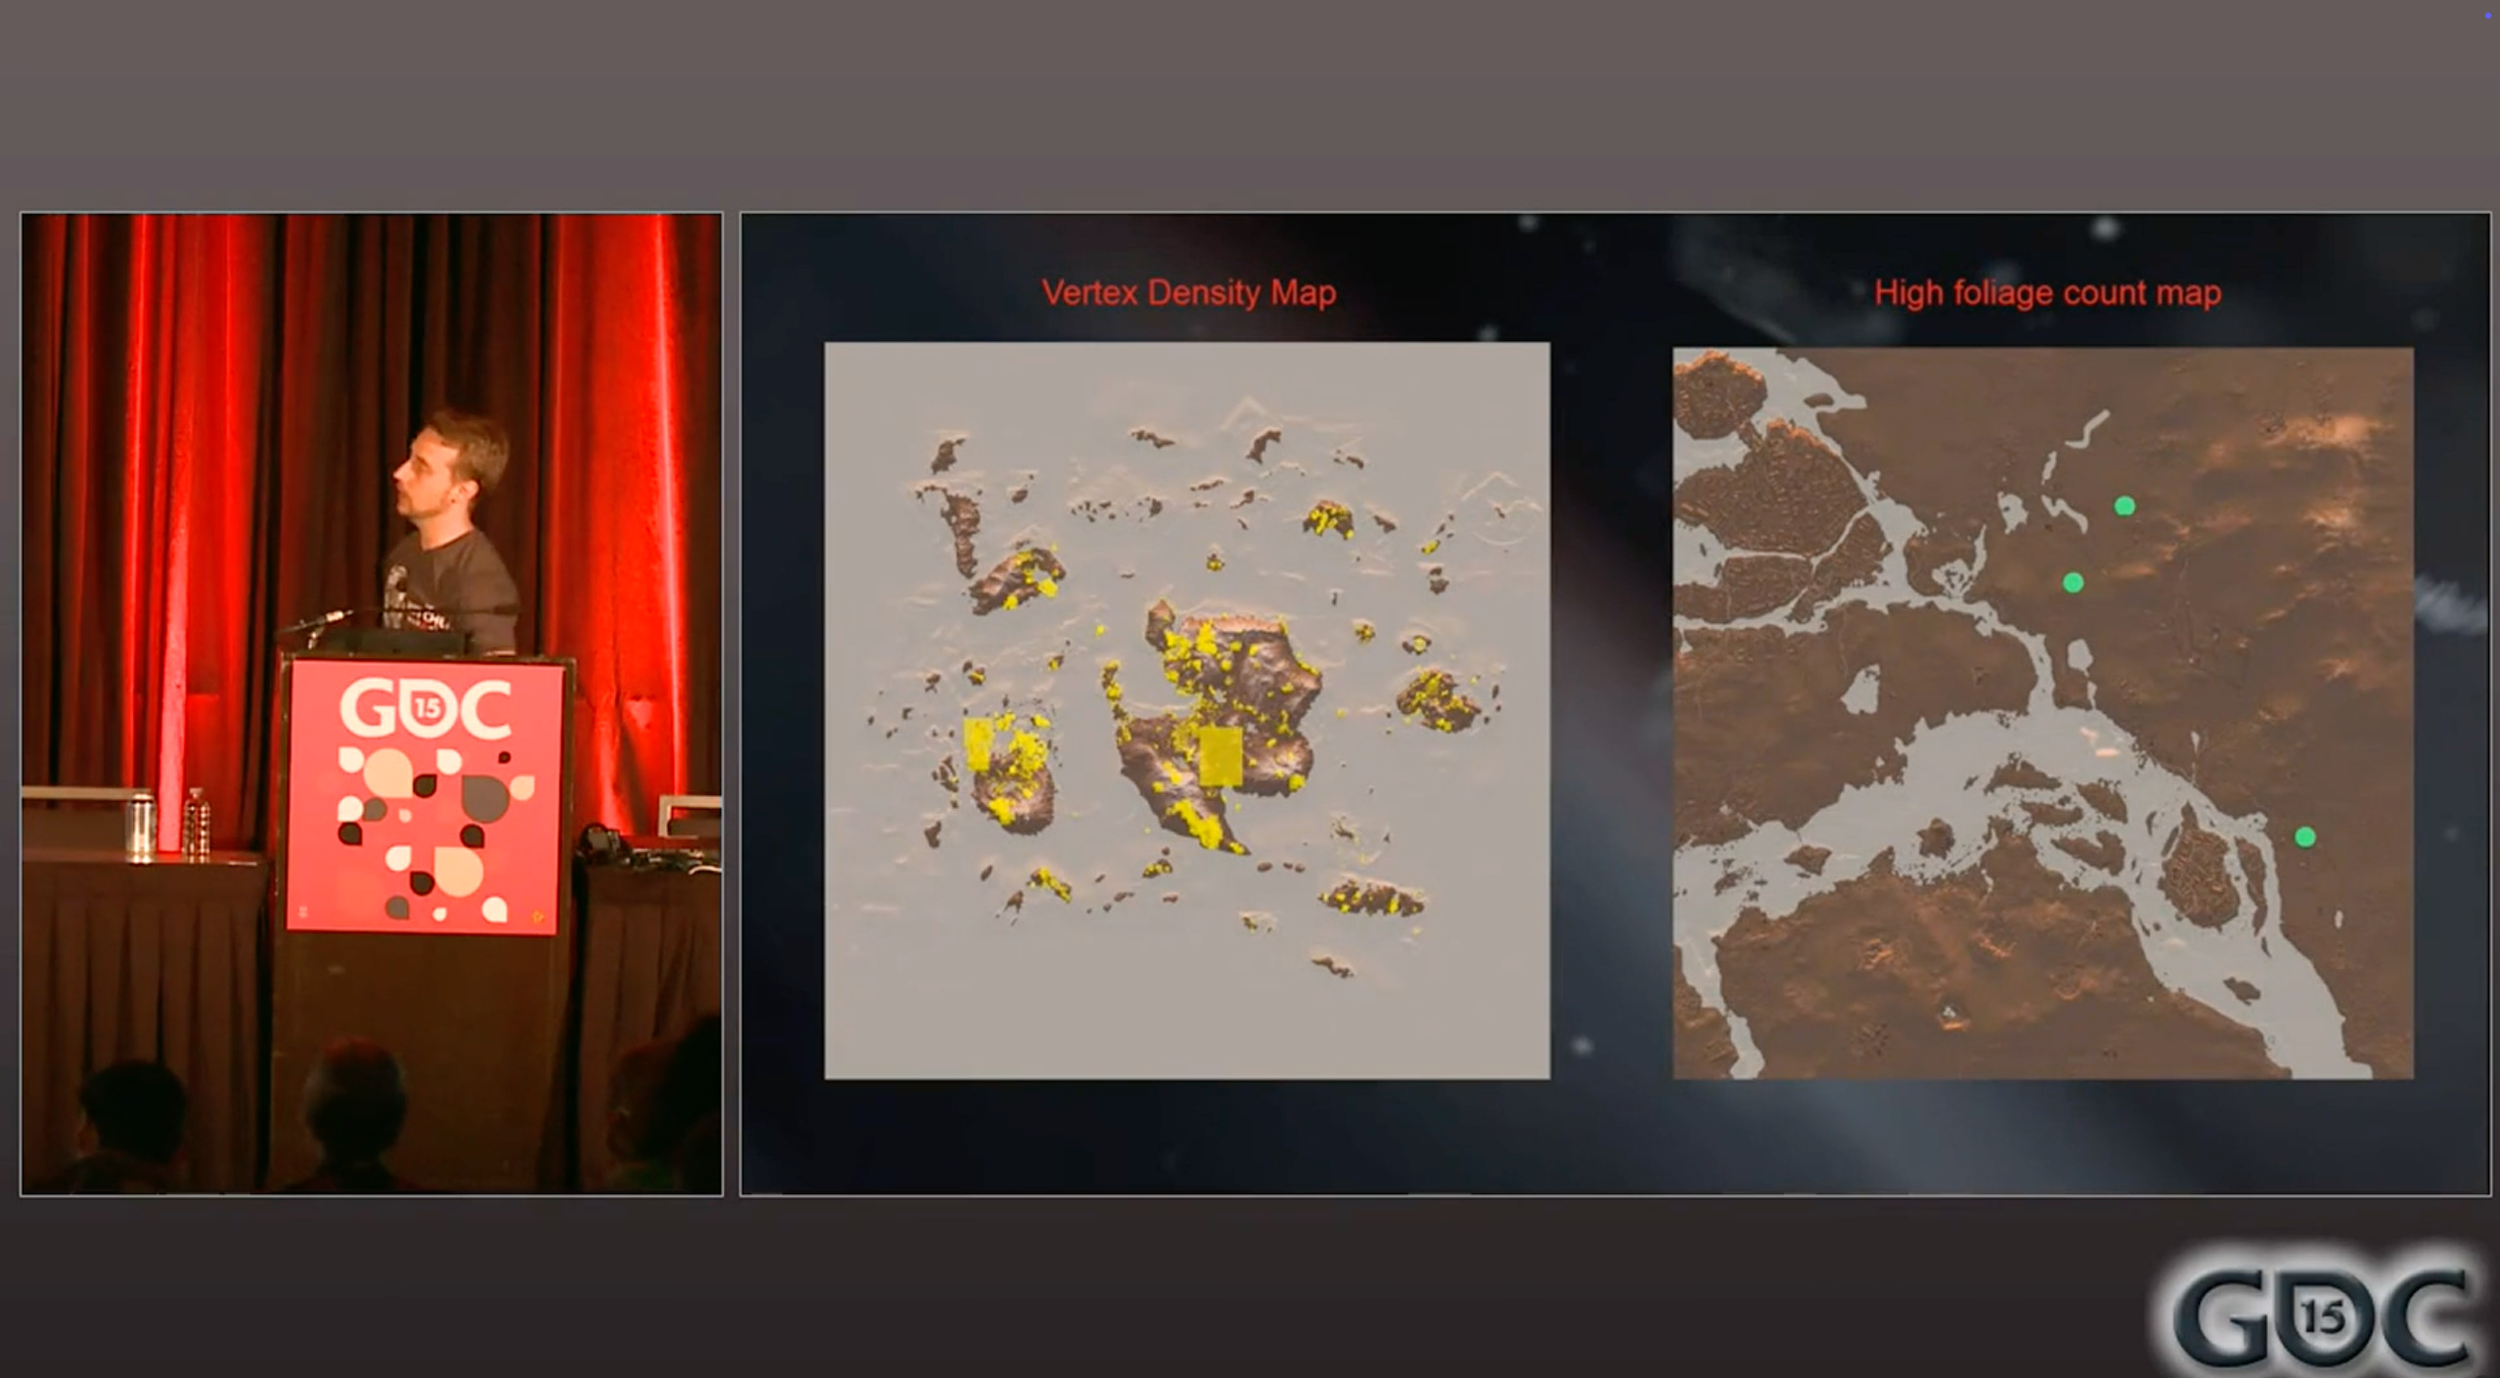
Another pictures of Martin Thorzen looking at his database viewer.
So we can see that this spatial context exists both in 2D and 3D.
Another great example is visual scripting, with node editors, such as Blueprints. Maybe you have a character blueprint, and so the backward root / spine / neck section gets a backwards arrow icon for easy identification. And a setup sine / neck section gets a setup gear icon.
So you can leave comments, and use Emojis as icons for information that is spatially close to their context.
Keeping context spatial in-editor is helpful for workflows. Godot does this in a great way.
If I have an object here, a node, I can right click on that and say open documentation in the dropdown. It opens the documentation inside the editor! Not a browser window, but inside the editor! I can even go to a particular property of that node, right click it, say open documentation, and it takes me to the exact spot of the documentation where it tells me about that particular property. And if I wanted to go to external documentation, it is not going to stop you. You can still click a button and open a browser. I think Godot did an awesome job implementing this kind of stuff. This looks really nice.
So, what makes good Spatial Documentation?
They are easy to create (Mouse, Keyboard, and Controller). Maybe type it out, or even speak it in to automatically create the text, or have the voice file play like in commentary nodes
They have screenshots & ticket system integration
They contain links to external data where necessary
So that’s takeaway number 4: Build spatial & contextual documentation!
And we can even combine these techniques. Like Peanut Butter & Chocolate, you can combine Spatial Notes & Zoos.
Combination of features, to create workflows
So here's again a little demo from Scene Notes by Ciro Continisio.
There are a bunch of assets here in the Zoo and there are spatial notes attached. So we see like, oh yeah this needs material changes or whatever it might be. We can see it's the art review category as a screenshot attached. We can see who made the comment and when they made that comment. Again just grab that information automatically if you have it.
Or another great combination: Gym & Zoo
Which is kind of done by Apex Legends a little bit. I think this is really cool.
Like you have all your item assets laid out here. You can see all them. You don't need to remember what the console command is to spawn any of these items. They're all laid out. All the weapons, all the ammo, you grab them, they instantly respawn.
(As a bonus for this textual article version: Check out the longer video above, in which you can also see the settings for AI movement, the supply box with all gear, infinite ammo reload settings, hit marker settings, and so much more.)
This is so much easier to work with, right? Like when someone's wondering, "What thing do I need to edit? What does that look like? Can I try this out?" Load up this item Zoo and it instantly works. Like here's some health, here's some ammo, everything works together. You can grab this gun and instantly start shooting because there’s an enemy right there. So I can instantly start testing things, for QA purposes, or automated testing, it’s lovely.
Now you may wonder, is there a combination Gym, Zoo, Museum out there? Well, there is one that I think comes close
An Evening with Infinity Ward, from Call of Duty: Modern Warfare 2, released in 2009.
We can see characters placed together with assets, we can see them move. We see multiple vignettes with the style and vibe of the levels and locations. There are also items, in this case guns, displayed clearly, and we can inspect and pick up each one. And shoot right away. There is also a section for vehicles, where we can see them in miniature form, and in larger form. We can see sections with NPCs having animation, VFX, displayed even under water. And I really like the one of a character repelling down in slow motion.
But, where is the shooting range? Well, on the big red button, do NOT press F. Because when you do, all the NPCs come to life and start shooting you, and you can shoot them too!
Now, this is not as much of a an actual testing ground, it’s probably best to split up your gyms, zoos, and museums a bit, but you can see how neat it is, right?
So the next time that your documentation slowly goes out of date: Instead, build:
A gym.
A gym
A zoo.
A Zoo from Counter-Strike: Global Offensive, for level de_nuke, which Valve released.
A museum.
A Museum, from Epic Games, for their Unreal cloth system
And document spatially.
Thank you, please subscribe
Thank you very much! You can subscribe to see more articles about workflow design in the future, ask questions in the comments, and follow me on LinkedIn, Bluesky and Mastodon.
And a big thanks to Ciro Continisio, CookieBadger, Brendon Chung, Kenney, Chris Hanney, Arden Osthof, Alex Tokmakchiev, and others.